Friday, July 19, 2013

Stuffed Zucchini


Background

Several years ago, when living in the northern Midwest, I made my foray into vegetable gardening after realizing how much money I was spending on produce.  Besides the amount of work that goes into creating a garden of this sort, I learned one very important thing: you have to watch your zucchini plant closely.  Otherwise, this happens:


Now, let's fast-forward to the present.  I once again have a vegetable garden, but this time in California, where I'm now convinced all plants are sold with alien steroid technology in them.  This garden is largely thanks to my father, who built me a gorgeous custom planter box and then planted vegetables for us while we watched over our family's newest edition.  At the beginning, I was quite good at checking the plants regularly, but with an infant in the house, that regularity becomes a thing of the past more quickly than one might think.  I was still getting out about 3 times a week, but what I wasn't doing was spending enough time looking.  Yesterday, I picked up a leaf I ordinarily don't look under and discovered... well, I'll let the picture do the talking:


Yeah, it's worse than the first one.  We weighed it: 5 lbs.  Thinking that when I cracked it open, it would be all seeds (like the previous zuc), I figured I wouldn't be able to do much with it.  Turns out, it didn't have that many seeds at all, and I had halved it lengthwise, so it was perfect to stuff.


Ingredients
1 unbelievably giant zucchini -or- 2 large regular, non-mutant zucchini, halved lengthwise
1 lb. ground beef
1 lb. ground turkey (or 2 lbs. of one of these - this is just what I had)
1 egg
1/2 C. whole grain bread crumbs
1 8 oz. can diced tomatoes, not drained
1 small red onion, chopped
salt, pepper, granulated garlic, dried rosemary, dried oregano, etc. to taste
goat cheese (optional)

Directions
Scoop seeds out of each zucchini half, making sure the hole you create is big enough to hold a stuffing mixture.  I scooped some of the flesh of the zucchini as well.  If you do this, reserve it in a bowl and mix it into the stuffing.  Place zucchini halves in a 9x13" baking pan (or 2 if you have the giant mutant variety!).


Mix the rest of the ingredients together, mashing with your hands.  Stuff mixture into zucchini.  It will be quite tall.  Any extra can fall to the baking dish around the squash.  It'll cook too.  If you are using goat cheese, press little chunks into the top.


Bake at 350 degrees for an hour, or until meat and zucchini are cooked through.  Let cool a bit and enjoy!


Friday, February 22, 2013

Fast Food Made at Home: Take That, Egg McMuffin!


Background
Can I do that?  Can I mention "Egg McMuffin" in my post, or title no less, and not get sued by McDonald's?  I guess we'll find out!  Some time back, I started a series about mimicking fast food in your own kitchen.  Of course, the thing we want to mimic most is the taste; we're interested in attempting to ban all the preservatives, chemicals, extra fat and the like that somehow get injected into many fast food items.  So, with that in mind, and in combination with a mandate from my ob and gestational diabetes dietician to heavily watch carb intake, I present the next installment: the breakfast sandwich.  My iteration here is an attempt at one that uses egg, canadian bacon and cheese, but if you're a sausage or bacon fan, feel free to substitute.  I will say, the canadian bacon option is nice because it's so fast - and far less greasy than cooking bacon!  But see below for suggestions on subbing other meats.

Ingredients
1 egg
1/2 whole wheat sandwich thin
1 slice nitrate-free canadian bacon (I use a version from Hormel)
1 slice lowfat cheese (look for versions of provolone, swiss and cheddar from Alpine Lace or Sargento)
salt to taste
basil (or other seasoning, such as dill) to taste

Directions
 
In a small ramekin, beat egg with a bit of water, salt, and whatever spice you choose, if you choose. 


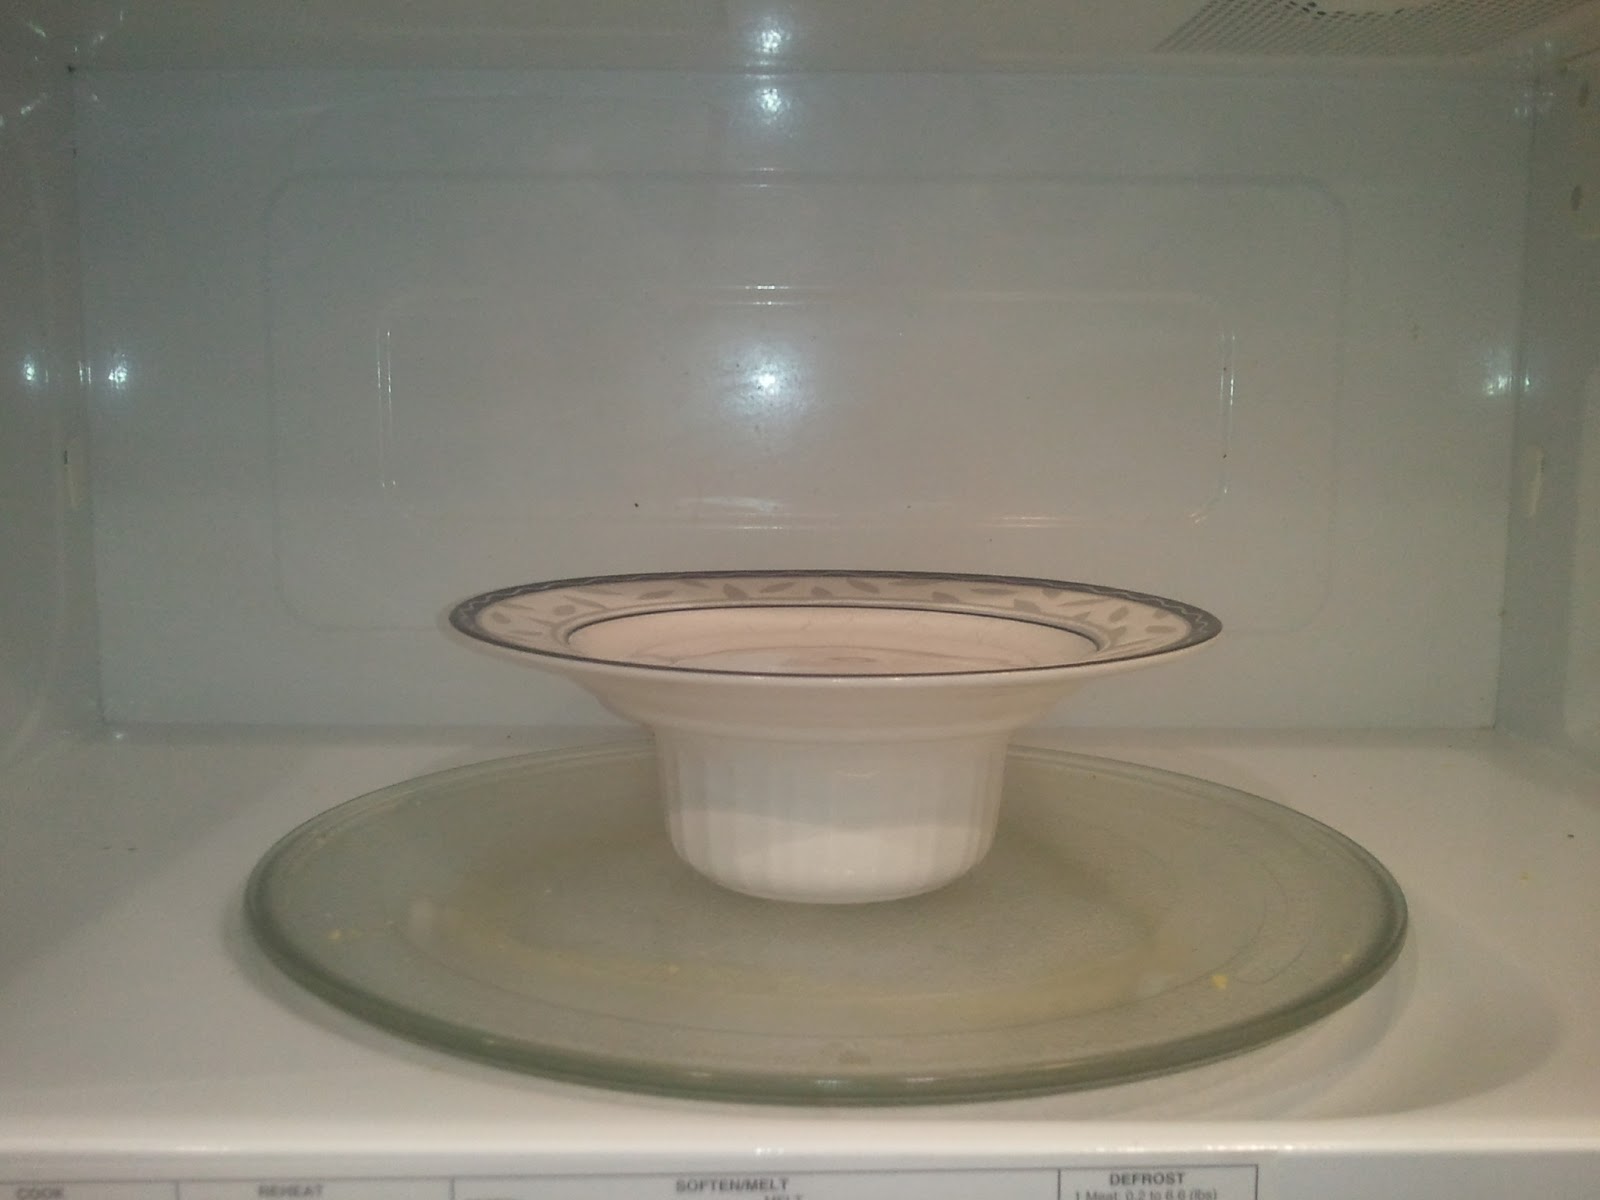
Place in microwave, covered with a salad/dessert plate.  Cook at 70% power for: 60 seconds for a jumbo egg, 55 seconds for a large egg.  You may hear some popping, but don't worry.  Your plate should be heavy enough to keep the egg in the ramekin.  If it gets too wild, pause the cooking process, let the egg settle down and then restart. 


Note that your microwave and mine might be different, so if this happens a lot, try cooking for slightly less time or at a slightly lower power level.


When egg is done, remove plate from top, wiping off bottom with a kitchen towel.  Place the 1/2 sandwich thin onto the same plate, topped with the canadian bacon and the cheese.  Remove the ramekin with the egg in it and put the plate in the microwave, heating contents for about 15 seconds, just until cheese is melty.  Remove the plate.  Run the handle end of your fork around the edge of the egg in the ramekin to loosen it from the sides.  Invert the ramekin over your thin, canadian bacon, and cheese so that it falls into the center. 


Let cool for a couple minutes and enjoy!


Substitutions and Notes
• In a fit of poor planning, one morning I ran out of canadian bacon.  I did have some nitrate-free ham, however, and popped a couple super thin slices of that atop the sandwich thin.  It was delicious and just as easy!

• If you like sausage or bacon, you can always feel free to cook some and use it instead.  The reason I haven't is because this dish is so easy and takes very little time.  To prepare those meats not only requires some forethought on my part (please read other blog posts to realize how elusive forethought is in my life!), but it also dirties a pan.  However, if you don't care about those things - forge ahead!

• If you care less about preservatives, but like the bacon and sausage, there are plenty of products out there that might make adding them to your sandwich a bit easier.  Hormel makes some bacon bits that seem more like real bacon than I remember from the past - they may be called bacon pieces.  Those could even be added to your egg mixture instead of put directly on the sandwich thin.  I have also seen some frozen sausage options that might be easy, though we've only ever tried the Morningstar soy product.  If you try any of these and it's fantastic, be sure to leave us all a note letting us know!

• Astute readers will notice that I've only used half a sandwich thin.  This is, in fact, an open faced sandwich.  Making it this way brings me up to 11 g of carbohydrates for breakfast and, in my current condition, that is all my body can handle.  If you're not in my same boat, feel free to add the second sandwich thin half on top.  Then you've got a real sandwich!

Wednesday, January 23, 2013

Baked Buffalo Chicken Breasts - Attempt 1


Background
Sometime early in the day, I took out chicken breasts to thaw.  Tossing them in the microwave - the one place we found we can let meat thaw without cats getting at it - I made a mental note, "at some point today, I should figure out what to do with this."  And then, magically, it was 5:30.  Crunch time.  Having recently being diagnosed with gestational diabetes, recipes have become a bit more restricted, but I felt confident I could come up with something using my tried-and-true "rummaging through the fridge" technique.  What was that?  Some Buffalo Wild Wings Spicy Garlic sauce, and what do you know, it had a very, very small amount of carbs.  Bingo!  I set to work, thinking about several other recipes I'd made in the past and combined things to come up with this one.

Thing is, it didn't turn out as awesome as I would have liked.  But I think it's important to admit that to you, and to myself.  It's all part of the process of cooking.  Sometimes we're not awesome, folks.  And it's really okay.  How not awesome was I?  Well, I lost most of the spicy garlic buffalo taste, so fairly.  Not to worry, we still ate it and it was still delicious with a tangy aftertaste, just not what I intended.  Dipped in additional sauce, it was outstanding.  I will include some thoughts on modification below the recipe.

Ingredients
1 whole boneless, skin-on chicken breast, cut in half
2 T. Buffalo Wild Wings Spicy Garlic sauce (or other favorite buffalo sauce - this one is dairy-free)
1T. extra virgin olive oil
1/8 C. bread crumbs
Italian seasoning
Tarragon
Salt
Pepper

Directions
Preheat oven to 400 degrees.  Wash chicken breasts and pat dry.  In a bowl large enough to dip each breast in, whisk buffalo sauce and olive oil together.  On a small plate, mix bread crumbs and seasonings (to taste - I added the tarragon for sweetness… I actually wanted basil, but was out - how did that happen??).  Dip both sides of each chicken breast into the sauce mixture and then dip skin side into bread crumbs.  Place in baking pan, skin side up.  If you have extra bread crumb mixture, sprinkle or pat onto chicken breasts.  Bake in center of oven 20-30 minutes (depending on thickness of chicken breasts), until juices run clear and meat is cooked through (no pink).


Accompanied with Easy Garlic Aioli (below)

Notes
As mentioned above, I lost a lot of buffalo flavor in the cooking process.  The next time I make this dish, I will try one of the following:
• omit mixing the olive oil with the buffalo sauce.  I did this because I thought it would coat better, but I fear it just diluted the flavor
• poke chicken breasts with a fork and let them marinate in the buffalo sauce/olive oil mixture for a few hours before dipping in bread crumbs


Easy Garlic Aioli
1/2 C. light mayo
1 heaping teaspoon chopped garlic (I used the jar stuff because I'm simply exhausted)
1 T. lemon juice (or juice from one lemon from our tree - which are somehow super potent)
1/4 t. salt
1/4 t. pepper (or both seasonings to taste)

Mix ingredients together, cover and let sit in fridge for at least half an hour.


Thursday, January 3, 2013

Salsa Chicken


Background
I found a good sale on tomatoes in the grocery store, so brought a bunch home.  I never know what I'm going to do with them when I find them, but given the tomato consumption rate in this house, I never worry they'll go unused.  So, I decided to make salsa.  The first night, it accompanied fajitas, but even with second-trimester hunger on my side, we had a bunch left over.  The next night, I longed for something more hearty and eyed the chicken breasts and potatoes I had awaiting my culinary spin.  Sure, let's toss it all together, I thought.  Lo and behold: an easy, yummy, filling dish that I would deem good year-round!

Ingredients
2 bone-in, skin-on chicken breasts
1 lb. potatoes, cut into 1" cubes
1 - 1.5 C. homemade salsa (recipe below - can be made ahead of time)
Salt and pepper to taste

Directions
This will be short and sweet, folks!

Preheat oven to 400 degrees.

Wash chicken breasts and pat dry with a paper towel.  Place skin-up in a 9x13" baking dish.  Place diced potatoes evenly around chicken.  Spoon salsa over potatoes and a bit of the juice over the chicken.  Sprinkle top of chicken with salt and pepper.


Bake, uncovered for 45 minutes or until chicken is cooked through and juices run clear; the skin of the chicken should have a lovely golden-brown color.


Salsa Recipe
2 C. finely diced tomato
1/2 - 3/4 C. finely diced onion
1 finely diced pepper, serrano or jalapeno - depending on heat preference (optional)
1 heaping t. minced garlic
juice from 1 lemon or lime
olive oil
salt and pepper

The quantities I specify are subjective and anything that does not have a quantity (olive oil, salt and pepper) really should be added to taste.  If you really like onion, add more; if not, add less.  If you love a super spicy salsa, omit the serrano and jalapeno and go full-on habanero!  Honestly, I do the whole thing by sight and taste.

Please also remember that as your salsa sits, the flavors will come out more.  I made a salsa once with a good friend early in the day.  When we tasted, we felt very little heat, so added more pepper.  By the time we ate that night, our eyes were watering.  Lesson learned!

Thursday, December 6, 2012

Culinary Question of the Month


With December all upon us, it's natural to think to the holiday season.  For me, that often means baking... particularly cookies.  So, I ask you: What cookie, if any, do you absolutely want to make this year and why?


Sunday, December 2, 2012

Simple Chili


Background
The great state of California seems to have two seasons: dry and wet.  Wet tends to roll around this time of year and, without fail, always makes me want to curl up at night with something warm to eat. One of my go-to dishes, incidentally also very good on oh-so-frigid Wisconsin nights, is chili.  You can go out and find a plethora of variants on this dish, but I find that having a simple recipe down is best.  Once you have that, elaborate as you wish.  What follows is my basic chili recipe for lazy, chilly nights.


Ingredients
1 lb. ground turkey
1 14 oz. can diced tomatoes
1 14 oz. can kidney beans
1 C. frozen corn
1 green pepper, diced
1 pkg store-bought chili seasoning
-OR-
Homemade seasoning (mine is Penzey's Arizona Dreamin', salt, smoked paprika, cumin and a thickener like corn starch or flour)


Directions
In a large sauce pan, brown the turkey.  The particular pans I use do not require lubrication to do this, but you know your cookware.  If you usually need oil to prevent sticking, please apply.  If I am going to allow my chili to cook for several hours (i.e. by some miracle, I harnessed forethought that day), I brown lightly.  If it's an hour before dinner and I'm summoning the energy to even get off my butt, I brown more thoroughly.  No one wants undercooked meat.


Hello Turkey


If your turkey creates grease, you can drain it and return the meat to the same pot (mine typically produces little enough that I skip this step).  Pour in the tomatoes, kidney beans (juice and all), and corn.

Wait, green peppers?


Mumble an expletive to yourself as you run to the fridge for your forgotten green pepper.  Dice and add to pot.  Note: some people like a nice, big bite of pepper, others prefer it to add color, but never be the main player in any given spoonful of chili.  Dice according to your preference.  Add the seasoning and let the whole pot simmer over medium-low heat until you hear your husband pedal up the driveway and request you open the garage.

Mmmm...incorporatey


Notes
As I said, this is a basic recipe and it can easily be changed, thusly:

1. One change we make quite often is omitting the meat.  In this case, I tend to add a second kind of bean or sometimes a grain, like quinoa or couscous.   More veggies is another popular option around here.  Diced or pearl onions, zucchini, and even spinach have been big players in the past.

2. Don't feel married to the kidney bean.  I know, I know, leaving out the kidney is probably somehow blasphemous to the real world of chili (though I seem to remember reading somewhere that beans weren't in "real chili"), but I just don't see it.  We often use black beans instead of, or in addition to kidneys.  And if I'm doing a chicken chili, I will use cannellini (great northern or navy) beans.

3. I've said it before, but I'll say it again: always play with spice.  You know what you like - or what your guests like.  Don't feel constrained by what a store will sell you.  Sometimes I'm in a more cuminy mood, so I toss a bunch of that in.  If I'm cooking primarily for my husband, I'll kick up the heat factor with some red pepper, or his cherished 'rooster sauce'.  And please, if you stumble upon an unbelievable combination, write it down.  You'll think you'll remember.  You won't.

Wednesday, November 28, 2012

Life of Kitchen

Sometimes at icanstandtheheat, things happen.  For example, one might buy a house whose kitchen is sold looking like this:

[Of particular note are the unfinished counter tops (including, though not overly evident here, lack of grout between the 12" tiles used), lack of appliances, dirt, grime, and grease on existing appliances, and just peeking in at the top of the photo: a giant, 1980's style florescent lighting fixture.  What you can't see?  The abundant mold growth in and around the sink due to improper installation, and the fact that the ceiling was dropped a full foot.  We still don't know why.  The flooring rode that fine line between not being pastel laminate tiles and being high enough quality laminate wood to actually come clean every now and then.]

Therefore, when one has climbed out of the debt of buying the house and saved enough money to redo the kitchen, one then must wait many weeks to eventually, and blissfully, arrive at this:

[Take a  moment; I do every time I walk in.  Solid counter tops, tiled floors, new, functional appliances, ceiling raised back up for extra storage.  See that little window up to the left of the range?  That was covered by cabinets before.  The lighting, you ask?  Recessed, LED on a dimmer and two new pendants for character.  And the mold?  Eradicated with extreme prejudice.  The properly installed sink should keep it at bay.  Happy. Joy. Time to cook!]

...

Except that sometimes at icanstandtheheat, other things happen sort of concurrently with the first things and one now spends a good amount of time here (typically sans cat):

And here:


Because one now looks like this:


That's right, we at icanstandtheheat anticipate the arrival of our first child in March.  And we have discovered that pregnancy, on top of a chronic pain condition, can be, well, a bit draining!  But fear not, we haven't given up.  In fact, we have a bit of a backlog of recipes and cooking experiences to upload that we promise to get to in the very near future.  So, to anyone who happens to still be reading, please stay tuned!


Sunday, July 22, 2012

Making Sausage

Bad blogger.  Bad, bad, bad blogger!  A 7-month-hiatus can't possibly increase readership, so I will apologize to you and get back to it: I'm sorry.  Here's a video about making sausage...


If you're reading this, you either want text instead of a video, or you clicked on the video, started watching and then exclaimed, "oh for the love of... this thing is 11 minutes long!"  Yeah, sorry about that.  It was a fun process and I got a little too giddy trying to make it all fit together.  Here is a written version.


Ingredients
5 lb. pork shoulder (also called butt or Boston butt)
3/4 lb. beefsteak (or really any cut of non-tendony beef - we used ground, actually)
garlic, minced
nutmeg (ew)
salt
pepper
fennel (optional)
red pepper flakes (optional)
pig intestines/casings (if making links)


Directions
The first thing you want to do is rinse and soak your intestine casings.  Yeah, it's gross, but you're making sausage.  The casings are going to come in a package in a sort of salty brine and so you want to rinse them and start to rehydrate.  Let them sit in a small bowl with an end sticking out - this way it will be easier to grab later.

Now that you have pig intestines sitting in a bowl on your counter (everyone's life ambition, right?), you can start preparing your meat.  Both cuts should be diced into 1-2" pieces.  Do not worry about exact size or uniformity; these are getting ground up.  Do keep them in separate bowls for now, though, and place them near your meat grinder (oh yeah, you need one of those).  You'll also want your minced garlic nearby - we started with a few minced cloves.

With either the fine or coarse cut disc in your grinder, start loading in meat and grind away!  You want a ratio of 3 parts pork to 1 part beef as you do this, adding in pinches of garlic here and there.  And don't forget a large bowl to catch all your ground yumminess.  When you get to the end, it will likely be difficult for your grinder to grasp the remaining chunks of meat and pull them through.  Never fear, simply take some of your ground product and put it back through.

*Please use caution while grinding - we want this to be made of pork and beef, NOT human fingers!*

When the meat is ground, it is time for what my family calls, The Argument Phase.  This is when you season - what you season with will be the result of who argues the most efficiently.  Garlic, salt and pepper are always a good start and we (not me, actually, but the rest of my family) like to put in some nutmeg.  Other popular ingredients include fennel seeds and red pepper (the latter for a hot Italian sausage).  Again, feel free to argue for whatever you want.  My brother, for example, argued quite vehemently for thyme.

When you believe you've seasoned well - take a chunk out of your bowl, flatten it and fry it up in a little pan with some oil.  Have everyone taste and then debate about what is missing.  We suggest seasoning lightly to begin with.  It's far easier to add more garlic or pepper than it is to add more meat!

If you are just making sausage to have ground sausage, you are done when the seasoning argument is complete.  You may cook immediately or freeze in chunks, blocks, cylinders, stars, infinity symbols, etc.  If you want a traditional string of sausage links, though, you must now case the ground meat.

You will use the same meat grinder, this time removing the cutting disc and putting the "casing funnely thing," as my brother calls it, on instead. Find the end of one of your casings and gently coax it open and over the tip of the instrument.  Then continue to thread the entire casing on - using a little of the water it's been soaking in to keep the casing and the "funnely thing".  Leave a little bit of the end of your casing unthreaded as you will need to tie off the end of the sausage link once it's filled.  Now, grind away!

You'll see the meat beginning to come out of the funnel and into the casing and will want someone standing at the end to support it.  That person can coax the product into a nice spiral as it continues to come out of the grinder.  When the whole casing is filled (also leaving a bit of the other end empty for making a knot), tie each end to prevent sausage leakage.  Then, at 6 inches or so, twist the casing a couple of times to make one link.  After the next 6 inches, twist the other way, and so on until you've reached the other end.

Ahhhhhh!  My casing broke!  Yeah, it'll do that.  If so, you can cut the long rope of sausages there and tie off each end.  It's not as long a finished product, but they still work as sausage.

I may have left something out.  If so, please let me know in the comment section below!


Thursday, December 15, 2011

Chocolate Dipped Pretzels


Background

Years ago, in high school, we used to have to sell holiday items for the extra curricular activities in which we were involved.  For me, it was choir and the catalog we brought home always included a tin of white chocolate covered pretzels.  As a rule, I don't like white chocolate, but every year, I used my own saved pennies to buy myself a tin of these delectable morsels.  When high school was no more and I needed to save those pennies for more necessary items, I realized I could make the pretzels myself at half the cost.  This year, I resurrected the idea, transforming (so far!) an entire giant bag of tiny twists into chocolate coated deliciousness.


Ingredients

pretzels
melting chocolate (white almond bark, milk chocolate almond bark, and/or Ghirardelli 60% dark chocolate chips, the latter being my favorite)
wax paper
festive sprinkles/decorating sugar (optional)
colored melting chocolate discs (optional)
nuts (optional)


Directions

The process here is blissfully simple.

White chocolate bark beginning to melt in double boiler
Place your chocolate of choice in a double boiler (legitimate or homemade!) and allow to melt, stirring occasionally to help the process along.


Pretzels bathing in melted white chocolate bark
When chocolate is completely melted and smooth, drop a few pretzels in and, using a fork, turn to coat.  Remove one pretzel at a time, allowing excess chocolate to drip back into the double boiler.  I use a big meat fork for this because the two prongs hold the pretzel, but still allow plenty of space in between for chocolate runoff...mmmmm, chocolate runoff.


Dipped white chocolate pretzels cooling on wax paper
Transfer coated pretzel to a piece of wax paper to cool, dry and harden.  You can break off excess chocolate once they've hardened... or just leave it :)  I think it gives a nice, homemade feel.  Plus, is there really such a thing as "excess chocolate"???


 Decorating tips:

Sprinkles or Decorating Sugars - these should be applied before the chocolate dries to assure they stick to your pretzel.  I find the sugars show up much better on a white chocolate base, whereas more opaque sprinkles are great on any type of chocolate.

Nuts - these should be finely chopped, or even super finely chopped.  You may choose to sprinkle them on as noted above, or you may also roll the pretzels in the nuts.  In this case, drop them directly into a bowl of nuts when you remove them from the double boiler.  Roll them in the nuts to coat and remove to wax paper so they can set up.

Chocolate Drizzling - If you choose to use a second kind of chocolate on your pretzels, I recommend drizzling in a back-and-forth motion over the pretzel.  This will give the effect of streaks.  You may choose to use colored melting chocolate (such as green or red for Christmas, blue for Chanukah, or team colors if you're watching the big game!) or a chocolate chip (semi-sweet or dark over white chocolate, peanut butter or butterscotch over dark chocolate).  Simply fill a plastic sandwich baggie 1/3 of the way with your chips.  Nestle them into one bottom corner of the bag and twist slightly so they don't spill out.  Place bag in microwave and melt in 10 second intervals, until the chocolate is melted.  Remove from microwave carefully, chocolate will be hot, and squeeze chocolate back into the corner of the bag.  Twist strongly above the chocolate to prevent it escaping out the top of the baggie.  With a pair of scissors, cut a small piece off the corer of the bag where the chocolate sits.  If the chocolate string coming out is too thin, you may cut a slightly larger hole in the bag.  Remember, you can always make that hole bigger, but cannot make it smaller, so it's best to start tiny.  Hold bag over batch of pretzels and squeeze a ribbon of chocolate over the pretzels in a back and forth motion.  Again, let them sit to dry, trying not to eat them all as they do :)

Friday, December 9, 2011

But I Don't Have One: Double Boilers

It's inevitable: You're reading through a recipe and you get to that one part "...place dough in pasta machine...", "...whisk eggs...", "...melt in double boiler."  You sigh heavily and think, "well, I can't make this recipe."  Is that always true?  Introducing a new series dedicated to discussing kitchen equipment and how we can replicate fancy versions with what we already own.  In this first episode, we will be discussing Double Boilers.


What is a double boiler?

Double boilers consist of two receptacles that nest and sit upon a stove or other heating device.  Water is placed into the lower receptacle, while the top receptacle is reserved for, largely, edibles.


Awesome - what's it for?

Double boilers are used in situations calling for heating a substance by maintaining a very constant temperature to prevent burning.  In my house, it is almost exclusively used for melting chocolate, but some other good candidates would be sauces and fillings (i.e. my goat cheese ravioli filling).  Some folks also use a double boiler to melt wax, but since I can't eat that, I won't discuss it here.


Soooo, why can't I just put the stuff in a pan?

You sure could, but it would be much more susceptible to burning.  When you place items in a pan over a flame or other heat source, that heat is not terribly even - despite high-end ranges!  When using a double boiler, one relies on the heat produced by boiling water and the ensuing steam.  If we all think back to grade school, we might recall that water boils at 212 degrees Fahrenheit.  In a double boiler, this temperature is maintained in the steam being produced right below the top receptacle.  There is more science here (key terms: energy, state change), but I'll leave it at this for now.


Okay, I guess I'll go buy a double boiler.

That would be fine.  Many people own them.  A quick glance online tells me that you can find them mostly in the range of $30 - $50, with some cheaper low-end models and a few high-end models with a similarly impressive price tag.  Might be worth it to you.

On the other hand, you can easily create your own double boiler with a sauce pot and a bowl, thusly:

Homemade double boiler (stained stove top, optional)
Find a pairing that will allow room for water and steam between the bottom of the pot and the bottom of the bowl you place on top.  That is, you do not want a bowl that sits completely on, or even very close to the bottom of your pot.  You need room for the 212 degree steam to mill around in there.  One other thing to note is that, in this situation our top receptacle has no handles, therefore it is nice to have an oven mitt on hand (no pun intended!) in case you need to touch the bowl.  Also, because these two pieces were not specifically made to sit together and because the bowl is contoured, there can be some movement of the bowl in the pot if you are manipulating what is inside (i.e. stirring filling, dipping pretzels in chocolate).  This slipping is not often severe enough, however, to warrant more than mild attention - you aren't going to spill your chocolate: I would never endorse anything that did that!


Truth time: In my adult life, I have never owned a double boiler.  I have gotten along just fine with the setup you see above.  I have nothing against double boiler owners, either.  But now you know that not owning one won't preclude you from that "chocolate dipped" recipe.  You, too, can be melting (but not burning!) chocolate in minutes - and I recommend it.  Go ahead.  What are you waiting for?  Do it.

Tuesday, November 15, 2011

Autumn Apple Currant Pork Chops

Background

It's that time again, folks.  The leaves are turning (or have fallen!), the air is brisk, and I can see my husband's whole face light up when I mention the prospect of apple pie.  And since he's open minded, he doesn't just limit his apple consumption to pie form.  No, he'll also accept pig, as well.  This is a recipe I came up with by combining a couple of favorite pork comfort dishes.

This recipe is also distinctive because it more closely resembles how I typically cook.  Some of the amounts of ingredients are approximate, given that I tend not to measure things.  For the purposes of this blog, I try to post concrete measurements in my ingredient list.  But really, sometimes, you just want to go by feel. So here is an example of me going by feel.  I hope you enjoy!


Ingredients

2 2" pork chops or 4 1" pork chops
1 C. rice
olive oil
2 medium-large apples
1 C. broth (beef, chicken or veggie)
1/4 C. dryish white wine (whatever is turning to vinegar in the fridge)
corn starch
several t. rubbed sage
good handful of currants
1 small tomato, thinly sliced
1 small green pepper, thinly sliced
1 small onion, thinly sliced


Directions

Preheat oven to 350.

Start rice cooking in a 3-4 quart pot.

In a medium-large sauce pan, bring broth to a simmer. Add white wine and stir well. While stirring continuously, add enough corn starch to thicken broth to a light rue (kind of syrupy consistency). Add 1-2 t. dried rubbed sage. Pour out of pan and set aside.

In same pan, brown pork chops in a little olive oil. Salt and pepper both sides while browning. Do not cook all the way through. Place browned pork chops in the bottom of a deep baking dish (make sure dish is big enough for apples to fit around the pork chops and deep enough for rice to go on top).

Peel apples and chop them into bite-size chunks (I use the apple corer/slicer thing that cuts out the core and slices the apple into 8ths - then I cut each 8th in half). Sprinkle in bottom of baking dish around pork chops. Pour rue over the apples and chops.

The rice should be done cooking now. Fluff with fork and add currants and another 1-2 t. of sage. Mix well. Pour rice over top of chops/apples in baking dish.

Place sliced veggies on top of the rice (my mom always put them on top of where each chop was so it was easy to figure out where to dig out the meat - the rice will cover them up).

Cover with foil and bake at 350 for 1 hour.

Notes

• When I did this, I used 1 t. of sage in the sauce and 1 t. of sage in the rice.  I kind of lost the flavor because by the time you put it all together, it's a lot of food that sage has to battle. That's why I suggested 1-2 t. in each place. Same with the wine... the sauce smelled wonderful when I made it, but I lost the wine flavor in the whole dish... so again, maybe play it by ear.

• I used the 2" chops and I was nervous about them not cooking all the way through, so I browned them a little longer. Mistake. And hour was plenty to cook them through. They turned out a little dry - better by the fat :)

• If you aren't a sage fan, play around. Another flavor I really like with pork is tarragon, but playing with flavor is always fun. If you stumble upon something extraordinary, be sure to let us know!

Wednesday, October 12, 2011

Simple Beef Stir-Fry


Background

Not everything you do in the kitchen has to be innovative.  That's something I've been struggling with regarding this blog; trying to get out of the mindset that only wow-factor stuff should go here.  And let's be honest, how much wow-factor stuff is going up, anyway??  The truth of the matter is that there is great value to being able to take simple ingredients and a simple recipe to make a wonderful dinner.  That's what I was feeling earlier this week after I found beef (stir-fry cut) on sale at the butcher.  After that, it was merely a matter of collecting and prepping a few, yummy additions!


Ingredients

1/2 lb. beef strips (or beef, sliced in almost a Julienne style)
1/2 red bell pepper, similarly sliced
1/2 green bell pepper, similarly sliced
1/4 - 1/2 onion, also sliced
1 can baby corn, drained & rinsed, cut into thirds
olive oil (could also use sesame oil - we didn't have any)
soy sauce


Directions

When all ingredients are prepared, place a large wok over medium-high heat.  Add olive oil to coat the bottom and let oil heat a bit, without burning it.  Add the veggies to the pan first.  You should hear that glorious sizzle as they hit the oil.  Allow them to cook a few minutes, tossing them often (or stirring if you're more comfortable).  Add the meat.  Continue to toss/stir the meat and veggies so that all are getting their fair share of the bottom of the pan.  As the meat starts to brown, add soy sauce to your liking.  A couple tablespoons may be a good start (you can always add more post-production).  This dish cooks quite fast, so you'll need to keep an eye on it - overcooked beef can become quite chewy.

Serve over your favorite rice or other grain (couscous, quinoa, etc.).

Thursday, September 29, 2011

Fixer Upper Pot Roast

Background

Let me paint you a picture: you found some beautiful butternut squash in your grocery store and what's more, it was pre-cubed.  Happy day!  So, you put it in your cart and spend the next several days ruminating over what exactly to do with it.  Unfortunately, it takes one day too many to land on 'oh, yummy pot roast!' and when you remove it from the refrigerator, it is sadly moldy.  Equally unfortunately, it is now 9:00 in the morning and you have but half an hour to get all your ingredients into the slow cooker before needing to start the activities of the day.  Rummaging through your stock of vegetables, you emerge with some summer squash, onions, tomatoes, a few sliced peppers and mushrooms and, the item that makes you most wary, brussels sprouts.  You love brussels sprouts, but have never cooked them all day and aren't sure how they'll hold up.  Nevertheless, you need something sturdy to sit on the bottom of the pot, so in they go.  Turns out, this was your best move in a long time!  In the end, those tiny cabbages will soak up so much of the meat juice and wine in the pot that they become exquisite, spongy balls of dinnertime yumminess.  You're welcome.

Ingredients

12 brussels sprouts, stalky ends removed
1 large onion, coarsely chopped
2 Roma/plum tomatoes, cut into large chunks
2 lbs. chuck roast, or similar cut
1 clove garlic, minced
salt & pepper to taste
1 C. summer squash, cut into bite-sized pieces
1/2 C. bell peppers sliced, or other veggies you have, like mushrooms
3/4 C. beef broth
1/4 C. Merlot
1 t. thyme
1 t. rosemary

Directions

Get your slow cooker out, baby, because it's time to cook by tossing a bunch of stuff in a pot, pressing a button and returning at the end of the day!  You need to know that this process is going to take 8-10 hours, so if you're reading this at 5:00 p.m., hoping for a quick dinner idea, sorry to disappoint.


Distribute your brussels sprouts evenly around the bottom of the pot.  Fill in extra space with half of the onion and half of the tomato.  Prepare your roast by rubbing it with salt and pepper on all sides.  Place into the center of the slow cooker pot, on top of the veggies.  Rub the minced garlic onto the top of the roast; don't worry if some of it falls to the sides, it's all going to the same place anyway.  Fill in the extra space around the roast with your summer squash and/or other vegetables.  Top those off with the rest of the onion and tomato pieces.  In a measuring cup, combine beef broth, wine, thyme and rosemary.  Pour mixture over meat and vegetables.  Cover the pot, set cooking temperature to low and cook 8-10 hours (I cooked mine for 10 and it was starting to get a little dry).  Remove meat to a platter and serve surrounded with vegetables.

If you so enjoy - we do - you can easily make gravy from the delicious juices at the bottom of the pot (those that escaped brussels sprouts absorption).  Strain the juice into a small frying pan and place over medium-low heat, reserving about 3 T. or so.  In a separate bowl, whisk together the reserved juice and some corn starch - enough to get the consistency you like.  I used about 1 T., but I like a thick gravy.  Pour this mixture into your frying pan, continually whisking.  Add 1 T. butter or margarine and whisk until all ingredients are well combined and mixture is thick.  Add salt and pepper to taste.

Sunday, September 25, 2011

Grilled 'Extra Hot' Potatoes

Background

My husband does not enjoy a potato lest it is deep fried and sprinkled generously with salt.  This sometimes causes a problem because, if my weight-maintenance goals would allow, I would eat potatoes every day at every meal.  Potatoes are also a fairly easy starch to toss on the grill.  Tonight, we were already grilling corn and beef, so I decided to attempt a version of roasted potatoes my husband would like.  In that pursuit, I turned to Gates Extra Hot BBQ sauce, one of our favorite Kansas City sauces.


Ingredients

1.5 lbs. baking potatoes (I used small creamers), cubed, ~1" pieces
1/2 medium-large onion, cut in large pieces
1/2 C. Gates Extra Hot BBQ sauce
1/8 C. olive oil

Parboiled potatoes, onion, and sauce


Directions

Parboil potatoes until just tender, 7-10 minutes.  Drain potatoes and place in large mixing bowl with onion, BBQ sauce, and olive oil.  Toss/stir to coat evenly.  Pour mixture into a foil packet and place over coals on grill grate.  Grill 10 minutes on one side.  Flip the packet over and rotate.  Grill another 10 minutes.
Potatoes in foil packet fresh from the grill

Monday, July 4, 2011

100 Calorie Summer Dessert

Background

With summer all upon us, I'm sure I'm not the only one thinking about ways to lose those extra insulating pounds I put on during the winter.  Ah yes, the cold, cold, frigid California winter.  But even summer desserts, with their yummy fruit, tend to still pack on the calories.  Last night, Mike and I stumbled onto a killer combination, however, using just three ingredients and adding a mere 100 calories to our daily total.  We enjoyed it so much, we had it again tonight.  Heck for only 100 calories, I might have it again for breakfast!

Ingredients

10 ripe red raspberries
4 T. Cool whip lite
1 T. Special Dark Hershey's Syrup

Directions

Measure out ingredients into a bowl, stir, eat and bask in that "nom nom" feeling you're going to get when finished.  Now, if you fancy ice cream for dessert, try Mike's trick (as lactose intolerant, he's had to get creative with frozen dessert): freeze the cool whip.  It won't taste like frozen cow's milk and sugar, but it's a decent substitute on a hot summer's day.  In this case, you can serve the dessert sundae style, with the berries and chocolate sitting on top of the Whip.


Calorie Breakdown

Raspberries = 1/berry (10 calories)
Cool Whip Lite = 10/T. (40 calories)
Special Dark Hershey's Syrup = 50/T. (50 calories)

Sunday, June 26, 2011

Almond Cookies with Lemon and Dark Chocolate Variations

Background

A few years ago, I was introduced to the wonder that is a pignoli cookie.  Pignoli, or pinoli, being the Italian word for pine nut, these delightful bites are an almond flavored cookie rolled in pine nuts and sprinkled with powdered sugar.  But, have you seen the price of pine nuts lately?  Good gravy!  While I love the taste the pine nuts add, I also love anything that incorporates almond paste, so I started making the cookies sans pignoli coating.

In fact, one of my first experiences making them without pine nuts was for an afternoon tea with a friend.  The recipe made a lot and she enjoyed them, so I sent her home with a tupperware full of extras for her and her husband to enjoy.  The report back? "My husband loves these cookies - says they remind him of some his mother used to make."  That cinched it.  These became a staple.

And then I got creative, mostly because nothing is really ever "finished" in my mind; everything can be improved upon.  Plus, I had a lemon tree going nutso in my backyard.  I played around with a batch of the almond cookie dough and came up with a lemon version.  Wanting to send some to a friend on the East Coast and feeling like I should have more than one variation on a theme, I came up with the dark chocolate version, as well (the first, and failed, iteration of which involved rolling in dutch processed cocoa powder - bitter!).

What follows is the ingredient list and directions for all three variations.  Try at will.


Ingredients
1 pouch (1 lb 1.5 oz.) Betty Crocker sugar cookie mix
½ C. granulated sugar
½ C. butter or margarine, softened
1 can (7 or 8 oz.) almond paste (not marzipan)
1 egg

3 T. lemon zest
yellow decorator’s sugar

½ C. 60% dark chocolate chips


Directions
Preheat oven to 350 degrees.  For plain almond cookies, mix the first 5 ingredients in a stand mixer until well incorporated.  I like to check dough to make sure there aren’t huge chunks of almond paste in places (then again, biting into a chunk of almond paste doesn’t seem like a horrible thing to me!).  With palms, roll dough into roughly 1” balls, trying to keep the dough balls a consistent size for each batch.  Place onto nonstick or greased baking sheet being sure to leave around 2” of space between cookies – they will expand.  Bake for 13 – 17 minutes, until cookies begin to become golden around the edges.  Remove from oven and let sit a few minutes.  Remove cookies to a cooling rack, but eat at least one while they’re still hot – it’s a religious experience.

For lemon almond cookies, add lemon zest to the first five ingredients and mix until well incorporated, again checking for big pieces of almond paste.  After shaping your 1” dough balls, roll in yellow decorators sugar and place on cookie sheet, 2” apart.  The rest is the same.

For Dark Chocolate Almond Cookies, make the plain almond cookies according to the directions above.  When cookies have completely cooled, melt 60% dark chocolate chips in a microwave safe bowl.  To do this, set the microwave to 30 seconds at full power.  After 30 seconds, stir chips and return another 30 seconds.  Repeat until chips are completely melted.  Note that getting water in your melted chips can cause the chocolate to seize (become hard and chunky).  This should be avoided so that your lovely baking experience is not suddenly interrupted by large amounts of swearing.  When chocolate is melted, dip half of each almond cookie in the chocolate and remove to a piece of wax paper.  Finished cookies can be set aside to set up or moved to the refrigerator or freezer for faster setting.

Baker’s note:  If you are the creative type, you may even decide to add further fanciness before the chocolate sets.  I suggest sprinkling the chocolate half of the cookie with some diced fresh almonds, colorful sprinkles or coconut.  Making these for a holiday?  Add some food coloring to your dough before baking – red or green dough against the dark chocolate looks very festive at Christmas time.  Springtime?  How about a pastel dough dipped in white chocolate instead of dark?  Don't be afraid to experiment.


Yield - at least 4 dozen.  Exact count will depend on how big you make them.

Friday, June 3, 2011

G'ma V's Ravioli - Pumpkin Goat Cheese and Spinach Goat Cheese

Astute readers have noticed that my main blog page contains a picture of ravioli.  "Are those yours?" they ask.  Not only are they mine, but I shall now grace you with the recipe, including a new filling I created last night.

Background
Some of my earliest and fondest memories include cooking and baking with my family.  Grandma's house, where I spent a lot of time as a child, almost always smelled of garlicky, sausagy red sauce.  And though I often watched and helped cook, somehow I only recently became interested in making ravioli from scratch (having "mastered" the sauce, plain ol' pasta and whole wheat pasta).  Upon receiving Grandma's "recipe" - something Dad typed up on the computer from Grandma's old notes - I discovered the fillings had cow's milk products in them, a blow to my lactose intolerant husband.  It would have been easy enough just to omit cheese and leave the filling mostly meat, but it was autumn and the spirit of the season hit me.  Plus, I had a can of pureed pumpkin sitting around.  When summer rolled around and spinach was once again in season, the alternative filling at the end of this post was born.

Ingredients for Dough
1 C. scant all purpose flour
1 egg
water

Ingredients for Pumpkin Goat Cheese Filling
1 C. pureed pumpkin (NOT pumpkin pie filling - they usually stock them next to each other, so watch out!)
1 oz. crumbled goat cheese (herbed if you like, but note the herbs then play with your end flavor)
1 t. dried rubbed sage (OR 1 t. another herb you like: you could easily go the sweeter route and add cinnamon or nutmeg... or allspice)
1/4 t. garlic powder
salt and pepper to taste

Directions

For the filling, place pureed pumpkin and goat cheese in the top of a double boiler (or a metal bowl that can sit on top of a sauce pan).  While over the heat, use a hand mixer to incorporate these two ingredients together.  You will see the color of the pumpkin puree mellow as the cheese melts in.

Remove from heat and add spices to taste.  PLEASE always taste as you go along.  You know what you like.  If you like a bit more of a kick to your food, you can use a stronger pepper than ground black pepper.  Set aside.


For the pasta dough, on a clean, flat surface, make a little mountain out of the flour.  Starting in the middle, top of the mountain, swirl your finger around wider and wider, so that there is now a hole in the center of your mountain.  Crack one egg into that hole.  With a fork, beat the egg inside the flour mountain.


As you beat, bring more and more flour from the mountain edges into the mixture.  When the flour and egg begin to form a sticky dough that is difficult to manipulate with a fork, switch to kneading with your hands, being sure to incorporate all the flour.


The dough will be dry, so add small amounts of water at a time.  I'm talking several drops, not even a teaspoon - the dough can get too watery quite quickly.  If your dough becomes too watery, fear not, just add a little more flour.  Work the dough until a solid, smooth consistency is reached.  Form dough into a ball and set in a bowl to rest, brushing the top with olive oil and covering with a cloth.  Let dough rest at least 15 minutes to relax the gluten.  With this recipe, you may have filling left over, so feel free to double the dough recipe.  The single recipe should make about 15-20 ravioli.


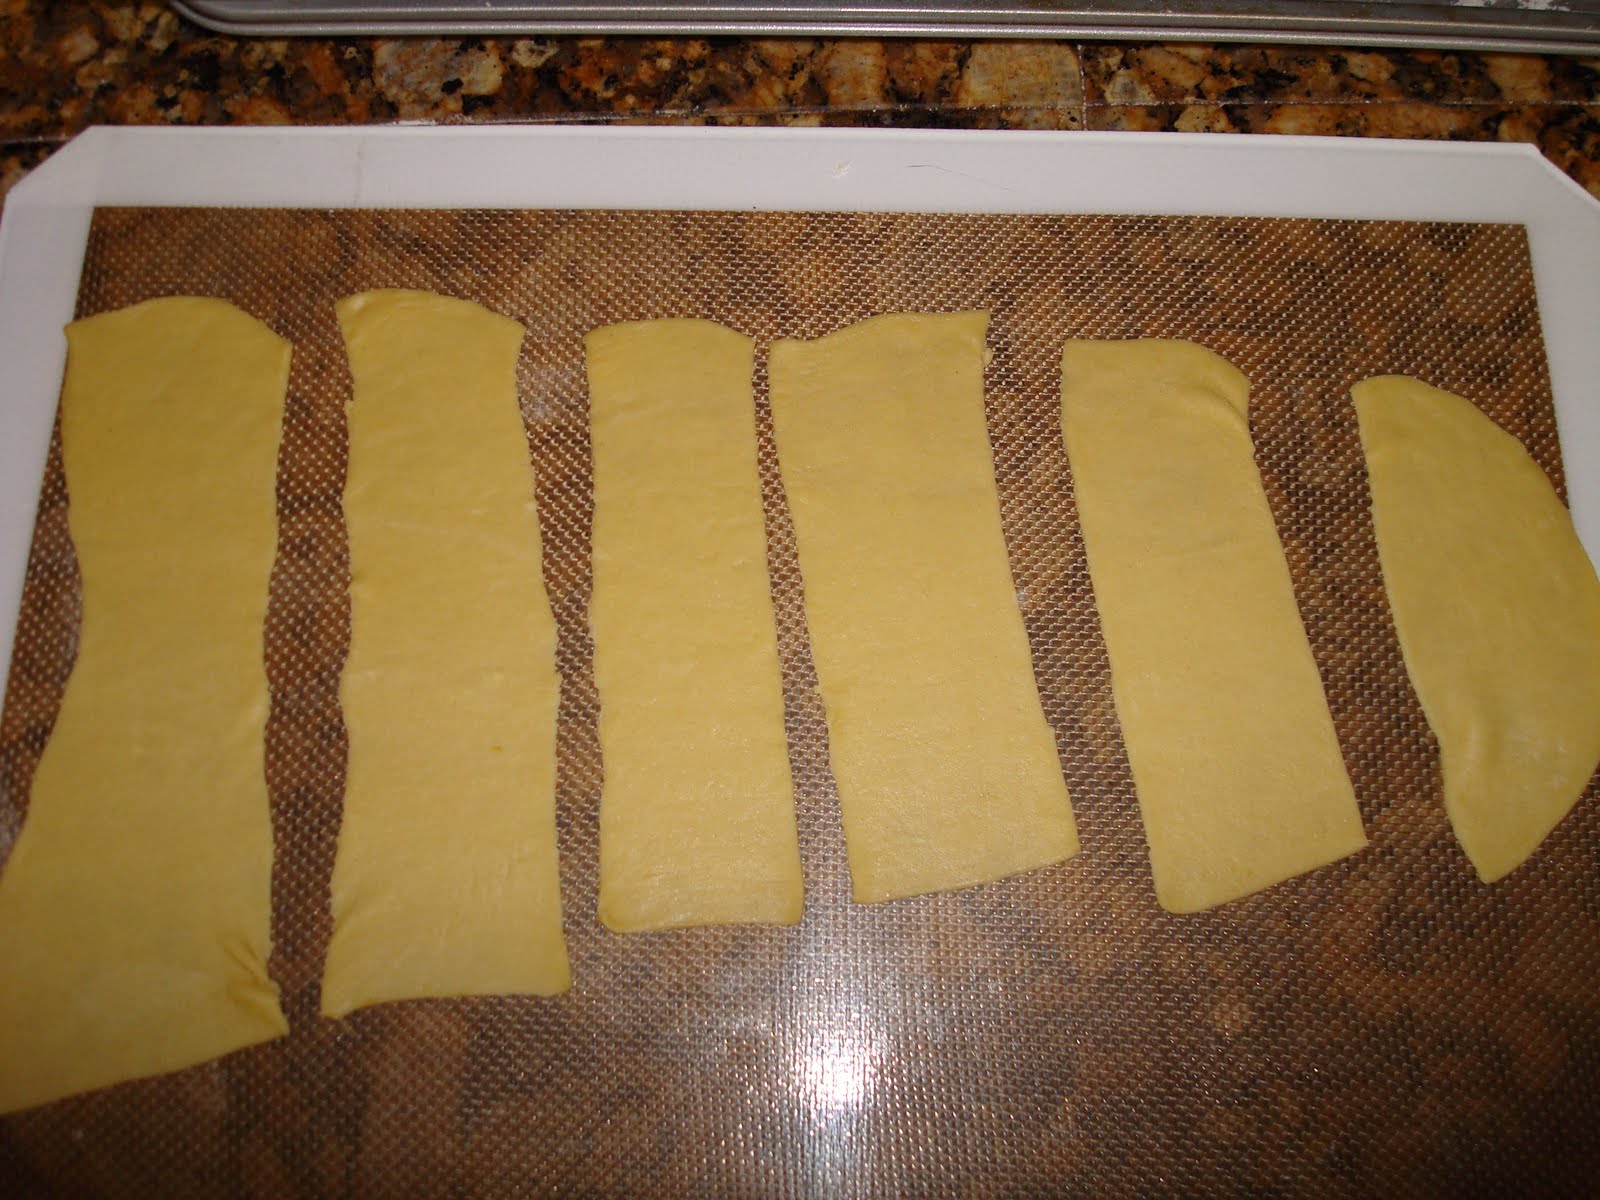
To assemble the ravioli, flour a large, flat, clean surface and roll dough.  Dough should be quite thin, so I find using the roller function on a pasta machine to be quite helpful (you CAN do this by hand with a LONG rolling pin - it will take time).  Follow the instructions on your pasta machine, but generally, you want to start on thicker settings and gradually switch to thinner and thinner settings.  You want a fairly thin dough, but not so thin that your filling will break through.  You'll likely need to work in batches; I usually cut the dough ball in half.  When desired thickness is reached, use a knife to cut ravioli dough into strips, about 2"x5-6".


Place a small amount - just under a teaspoon - of filling on one half of the strip.  You want to be able to fold the other half on top of it, so leave room.  Also, be sure to leave enough room around the edges of your pasta to seal it.  Fold the fillingless half of the pasta over onto the filling half and press edges closed with your fingers, being careful not to let filling seep out.


You can further seal the pasta using an everyday fork.  Using the tines, go around the three non-folded edges, pressing the tines firmly into the dough - but not hard enough to break through into the filling.  You can also trim the outside edges with a knife to make them more uniform - DON'T toss that extra dough, though - reroll it :)


Place finished ravioli on a lightly floured dish towel or piece of wax paper atop a baking sheet.  Do not stack - they will stick together.


If you are freezing your ravioli, sprinkle the tops of the ravioli with flour and place baking sheet(s) directly into freezer.  After a few hours, ravioli can be gathered from the sheets and placed into freezer bags for more compact storage.

To cook your ravioli, shake off any excess flour and place in boiling, salted water on the stove top.  Note: homemade, fresh pasta does not take as long to cook as store-bought, dried pasta.  For fresh ravioli, often 5-7 minutes will do the trick.  Frozen ravioli will take a few more minutes.  The telltale sign that it is done is that the ravioli will float on top of the water.


Spinach and Goat Cheese Filling
1 bunch/bag of spinach (washed, dried, stems removed and roughly chopped)
1/2 large onion, finely chopped
1 t. garlic, minced
olive oil
salt and pepper to taste
2 oz. crumbled goat cheese
1/2 egg

Over medium heat, saute onion in olive oil until almost translucent.  Add garlic and saute a couple minutes more, being sure to avoid burning the garlic.  Add spinach and toss, cooking until the greens are wilted.  Remove from heat and allow mixture to cool completely.  Add in salt, pepper, goat cheese and egg and mix well (I use my hands).  Your filling is now ready to be made into ravioli.  Again, you may have some filling left over - you can always make one more batch of dough.

Friday, May 6, 2011

Fast Food Made at Home: Chicken Nuggets

Background

I love chicken nuggets. Seriously. If you put a McDonald's chicken nugget in front of my face, I will smile (not as big as if you put a kitten in front of my face, but for different reasons...I'm not going to eat a kitten for cryin' out loud, you people are sick!  I digress). However, if you've never read the ingredients in a McDonald's chicken nugget, don't. Save yourself the feeling that your stomach is turning over and over and instead take a gander at the following recipe.

Aside from overall quality, there are three big differences between the processed, conveyor belt nuggets that are handed out that drive thru window and the ones produced in this recipe. First, I use a breadcrumb coating. Second, these nuggets are baked, NOT FRIED. And third, they are easily seasoned according to your tastes using spices, not sugary, salty, fatty sauces. Note: if you choose to use additional sauces, more power to you, I'm just providing the base here.

Ingredients
1 chicken breast, preferably fresh from a butcher
3/4 C. bread crumbs (I like Progresso Italian Seasoned)
Seasonings to taste

(yep, it's that simple, folks)

Directions
Cut the chicken breast into 1-2" squares, trying to keep the pieces relatively similar in size for even cooking. This is where a fresh chicken breast is much nicer. The frozen chicken breasts have often been pounded flat (as you would to make a roulade) and therefore cut into more of flat disks rather than chunks. In a small bowl, or ziplock bag, pour breadcrumbs and seasonings. If using a bowl, use fingers to coat each chicken piece and then place them on a baking sheet (I put them directly on the sheet, no oil and haven't had sticking problems, but if you're worried, I'd try using foil before adding fat :)). If using a ziplock bag (much more kid friendly), simply dump the pieces into the bag, seal with some air inside and shake to coat (it's Shake 'n' Bake, Daddy!). Bake pieces in a 400 degree oven for 15-20 minutes (depending on size of pieces) until cooked throughout.

Let's talk seasonings. This is the fun part, especially if you have children and a variety of spices. I find that at our house, we tend to get in a rut of flavor, using the same spices over and over. So why not try something new? Let your kids smell the different spices you have in your cupboard to see what they might like. Themes we've used and liked:

Taco: cumin, chili powder, garlic powder, salt
Italian: garlic powder, basil, oregano, rosemary, salt, pepper
BBQ: Mesquite Grillers BBQ seasoning, salt

I might also suggest an Asian theme using ginger, garlic and pepper
Perhaps an Indian theme using turmeric, cumin, coriander, cardamom, and garlic

The sky's the limit really and it's all about having fun as a family cooking together. Try a few different combos and have a taste test panel! See who can guess each family member's favorite! And by all means, if and when you do, let me know how it turns out.

Monday, April 18, 2011

Herbed Parmesan Bowls

Background

When Mom and Dad came to visit this month, Dad arrived with a plan in mind.  He had heard of Parmesan crisps and Parmesan bowls, but never saw the bowls done incorporating other flavors.  How hard could it be?  Turns out, not terribly.  The trick in this recipe is in timing the cheese melting correctly; once that is down, you can make as many bowls as you want, or your wallet allows.  The fun in this recipe is that because you make a bowl for each diner, you can personalize the seasonings.  We did a plain bowl, a garlic bowl, a rosemary basil bowl, a Pasta Sprinkle (TM Penzey's) bowl and a Pasta Sprinkle & garlic bowl.

Ingredients
rounded 1/2 C. grated Parmesan cheese
heavy 10" frying pan
vegetable oil
spices (such as basil, tarragon, dill, garlic, pepper, etc.)
cereal bowl (turned upside down on counter top)

Directions
Coat the bottom of the 10" frying pan with vegetable oil (just enough to coat, no excess) and place over medium heat.  Allow pan to become hot, then sprinkle Parmesan quickly and evenly around the bottom of the pan.  The cheese should begin to melt immediately.  Using a rubber spatula, push any cheese "stragglers" from the sides of the pan onto the bottom.  Allow cheese to melt and start to brown, ~3 minutes.  If using an herb or spice, sprinkle evenly around the cheese.  Remove from heat.

Finished Herbed Parmesan Bowls
Immediately, begin working the spatula under one edge of the cheese.  When it becomes apparent that the cheese will loosen from the bottom easily, turn the pan over *above your upside-down cereal bowl*.  Because the cheese may not release from the pan itself, you may need to encourage it with your spatula some more after turning it over.  With enough coaxing, the cheese will release from the pan and fall onto your bowl.  Seldom did we find it did so perfectly.  No matter, it is still quite hot.  If you find that it falls unevenly, or that a side or corner turns under, just reach in and fix it.  Warning: it IS still quite hot.  When you contact it to manipulate it, do so quickly!  You may also want to press it to the sides of the bowl to make sure it forms a tighter shape.

Allow the cheese bowl to cool upside down for at least 5 minutes, until it is hard and crispy.  Remove from cereal bowl and place on a wire rack or platter for later use.  Repeat.


Notes

Herbed Parmesan Bowl with Lemon Chicken Salad
• It was only necessary to oil the bottom of the pan for the first Parmesan bowl.  After that, the cheese released enough grease to do the trick for the next bowl.  Mmmm, grease.
• You may notice that some of your herbs stick to the bottom of the cereal bowl while the Parmesan bowl is cooling.  That is okay.  If you worry of cross-contamination, simply rinse your cereal bowl between Parmesan bowl construction.
• We chose to fill our bowls with salad, but you may also try fruit.  I would stay away from hot things because, well, melting.  But if you find some other winning filling, do let us all know!