Wednesday, October 12, 2011

Simple Beef Stir-Fry


Background

Not everything you do in the kitchen has to be innovative.  That's something I've been struggling with regarding this blog; trying to get out of the mindset that only wow-factor stuff should go here.  And let's be honest, how much wow-factor stuff is going up, anyway??  The truth of the matter is that there is great value to being able to take simple ingredients and a simple recipe to make a wonderful dinner.  That's what I was feeling earlier this week after I found beef (stir-fry cut) on sale at the butcher.  After that, it was merely a matter of collecting and prepping a few, yummy additions!


Ingredients

1/2 lb. beef strips (or beef, sliced in almost a Julienne style)
1/2 red bell pepper, similarly sliced
1/2 green bell pepper, similarly sliced
1/4 - 1/2 onion, also sliced
1 can baby corn, drained & rinsed, cut into thirds
olive oil (could also use sesame oil - we didn't have any)
soy sauce


Directions

When all ingredients are prepared, place a large wok over medium-high heat.  Add olive oil to coat the bottom and let oil heat a bit, without burning it.  Add the veggies to the pan first.  You should hear that glorious sizzle as they hit the oil.  Allow them to cook a few minutes, tossing them often (or stirring if you're more comfortable).  Add the meat.  Continue to toss/stir the meat and veggies so that all are getting their fair share of the bottom of the pan.  As the meat starts to brown, add soy sauce to your liking.  A couple tablespoons may be a good start (you can always add more post-production).  This dish cooks quite fast, so you'll need to keep an eye on it - overcooked beef can become quite chewy.

Serve over your favorite rice or other grain (couscous, quinoa, etc.).

Thursday, September 29, 2011

Fixer Upper Pot Roast

Background

Let me paint you a picture: you found some beautiful butternut squash in your grocery store and what's more, it was pre-cubed.  Happy day!  So, you put it in your cart and spend the next several days ruminating over what exactly to do with it.  Unfortunately, it takes one day too many to land on 'oh, yummy pot roast!' and when you remove it from the refrigerator, it is sadly moldy.  Equally unfortunately, it is now 9:00 in the morning and you have but half an hour to get all your ingredients into the slow cooker before needing to start the activities of the day.  Rummaging through your stock of vegetables, you emerge with some summer squash, onions, tomatoes, a few sliced peppers and mushrooms and, the item that makes you most wary, brussels sprouts.  You love brussels sprouts, but have never cooked them all day and aren't sure how they'll hold up.  Nevertheless, you need something sturdy to sit on the bottom of the pot, so in they go.  Turns out, this was your best move in a long time!  In the end, those tiny cabbages will soak up so much of the meat juice and wine in the pot that they become exquisite, spongy balls of dinnertime yumminess.  You're welcome.

Ingredients

12 brussels sprouts, stalky ends removed
1 large onion, coarsely chopped
2 Roma/plum tomatoes, cut into large chunks
2 lbs. chuck roast, or similar cut
1 clove garlic, minced
salt & pepper to taste
1 C. summer squash, cut into bite-sized pieces
1/2 C. bell peppers sliced, or other veggies you have, like mushrooms
3/4 C. beef broth
1/4 C. Merlot
1 t. thyme
1 t. rosemary

Directions

Get your slow cooker out, baby, because it's time to cook by tossing a bunch of stuff in a pot, pressing a button and returning at the end of the day!  You need to know that this process is going to take 8-10 hours, so if you're reading this at 5:00 p.m., hoping for a quick dinner idea, sorry to disappoint.


Distribute your brussels sprouts evenly around the bottom of the pot.  Fill in extra space with half of the onion and half of the tomato.  Prepare your roast by rubbing it with salt and pepper on all sides.  Place into the center of the slow cooker pot, on top of the veggies.  Rub the minced garlic onto the top of the roast; don't worry if some of it falls to the sides, it's all going to the same place anyway.  Fill in the extra space around the roast with your summer squash and/or other vegetables.  Top those off with the rest of the onion and tomato pieces.  In a measuring cup, combine beef broth, wine, thyme and rosemary.  Pour mixture over meat and vegetables.  Cover the pot, set cooking temperature to low and cook 8-10 hours (I cooked mine for 10 and it was starting to get a little dry).  Remove meat to a platter and serve surrounded with vegetables.

If you so enjoy - we do - you can easily make gravy from the delicious juices at the bottom of the pot (those that escaped brussels sprouts absorption).  Strain the juice into a small frying pan and place over medium-low heat, reserving about 3 T. or so.  In a separate bowl, whisk together the reserved juice and some corn starch - enough to get the consistency you like.  I used about 1 T., but I like a thick gravy.  Pour this mixture into your frying pan, continually whisking.  Add 1 T. butter or margarine and whisk until all ingredients are well combined and mixture is thick.  Add salt and pepper to taste.

Sunday, September 25, 2011

Grilled 'Extra Hot' Potatoes

Background

My husband does not enjoy a potato lest it is deep fried and sprinkled generously with salt.  This sometimes causes a problem because, if my weight-maintenance goals would allow, I would eat potatoes every day at every meal.  Potatoes are also a fairly easy starch to toss on the grill.  Tonight, we were already grilling corn and beef, so I decided to attempt a version of roasted potatoes my husband would like.  In that pursuit, I turned to Gates Extra Hot BBQ sauce, one of our favorite Kansas City sauces.


Ingredients

1.5 lbs. baking potatoes (I used small creamers), cubed, ~1" pieces
1/2 medium-large onion, cut in large pieces
1/2 C. Gates Extra Hot BBQ sauce
1/8 C. olive oil

Parboiled potatoes, onion, and sauce


Directions

Parboil potatoes until just tender, 7-10 minutes.  Drain potatoes and place in large mixing bowl with onion, BBQ sauce, and olive oil.  Toss/stir to coat evenly.  Pour mixture into a foil packet and place over coals on grill grate.  Grill 10 minutes on one side.  Flip the packet over and rotate.  Grill another 10 minutes.
Potatoes in foil packet fresh from the grill

Monday, July 4, 2011

100 Calorie Summer Dessert

Background

With summer all upon us, I'm sure I'm not the only one thinking about ways to lose those extra insulating pounds I put on during the winter.  Ah yes, the cold, cold, frigid California winter.  But even summer desserts, with their yummy fruit, tend to still pack on the calories.  Last night, Mike and I stumbled onto a killer combination, however, using just three ingredients and adding a mere 100 calories to our daily total.  We enjoyed it so much, we had it again tonight.  Heck for only 100 calories, I might have it again for breakfast!

Ingredients

10 ripe red raspberries
4 T. Cool whip lite
1 T. Special Dark Hershey's Syrup

Directions

Measure out ingredients into a bowl, stir, eat and bask in that "nom nom" feeling you're going to get when finished.  Now, if you fancy ice cream for dessert, try Mike's trick (as lactose intolerant, he's had to get creative with frozen dessert): freeze the cool whip.  It won't taste like frozen cow's milk and sugar, but it's a decent substitute on a hot summer's day.  In this case, you can serve the dessert sundae style, with the berries and chocolate sitting on top of the Whip.


Calorie Breakdown

Raspberries = 1/berry (10 calories)
Cool Whip Lite = 10/T. (40 calories)
Special Dark Hershey's Syrup = 50/T. (50 calories)

Sunday, June 26, 2011

Almond Cookies with Lemon and Dark Chocolate Variations

Background

A few years ago, I was introduced to the wonder that is a pignoli cookie.  Pignoli, or pinoli, being the Italian word for pine nut, these delightful bites are an almond flavored cookie rolled in pine nuts and sprinkled with powdered sugar.  But, have you seen the price of pine nuts lately?  Good gravy!  While I love the taste the pine nuts add, I also love anything that incorporates almond paste, so I started making the cookies sans pignoli coating.

In fact, one of my first experiences making them without pine nuts was for an afternoon tea with a friend.  The recipe made a lot and she enjoyed them, so I sent her home with a tupperware full of extras for her and her husband to enjoy.  The report back? "My husband loves these cookies - says they remind him of some his mother used to make."  That cinched it.  These became a staple.

And then I got creative, mostly because nothing is really ever "finished" in my mind; everything can be improved upon.  Plus, I had a lemon tree going nutso in my backyard.  I played around with a batch of the almond cookie dough and came up with a lemon version.  Wanting to send some to a friend on the East Coast and feeling like I should have more than one variation on a theme, I came up with the dark chocolate version, as well (the first, and failed, iteration of which involved rolling in dutch processed cocoa powder - bitter!).

What follows is the ingredient list and directions for all three variations.  Try at will.


Ingredients
1 pouch (1 lb 1.5 oz.) Betty Crocker sugar cookie mix
½ C. granulated sugar
½ C. butter or margarine, softened
1 can (7 or 8 oz.) almond paste (not marzipan)
1 egg

3 T. lemon zest
yellow decorator’s sugar

½ C. 60% dark chocolate chips


Directions
Preheat oven to 350 degrees.  For plain almond cookies, mix the first 5 ingredients in a stand mixer until well incorporated.  I like to check dough to make sure there aren’t huge chunks of almond paste in places (then again, biting into a chunk of almond paste doesn’t seem like a horrible thing to me!).  With palms, roll dough into roughly 1” balls, trying to keep the dough balls a consistent size for each batch.  Place onto nonstick or greased baking sheet being sure to leave around 2” of space between cookies – they will expand.  Bake for 13 – 17 minutes, until cookies begin to become golden around the edges.  Remove from oven and let sit a few minutes.  Remove cookies to a cooling rack, but eat at least one while they’re still hot – it’s a religious experience.

For lemon almond cookies, add lemon zest to the first five ingredients and mix until well incorporated, again checking for big pieces of almond paste.  After shaping your 1” dough balls, roll in yellow decorators sugar and place on cookie sheet, 2” apart.  The rest is the same.

For Dark Chocolate Almond Cookies, make the plain almond cookies according to the directions above.  When cookies have completely cooled, melt 60% dark chocolate chips in a microwave safe bowl.  To do this, set the microwave to 30 seconds at full power.  After 30 seconds, stir chips and return another 30 seconds.  Repeat until chips are completely melted.  Note that getting water in your melted chips can cause the chocolate to seize (become hard and chunky).  This should be avoided so that your lovely baking experience is not suddenly interrupted by large amounts of swearing.  When chocolate is melted, dip half of each almond cookie in the chocolate and remove to a piece of wax paper.  Finished cookies can be set aside to set up or moved to the refrigerator or freezer for faster setting.

Baker’s note:  If you are the creative type, you may even decide to add further fanciness before the chocolate sets.  I suggest sprinkling the chocolate half of the cookie with some diced fresh almonds, colorful sprinkles or coconut.  Making these for a holiday?  Add some food coloring to your dough before baking – red or green dough against the dark chocolate looks very festive at Christmas time.  Springtime?  How about a pastel dough dipped in white chocolate instead of dark?  Don't be afraid to experiment.


Yield - at least 4 dozen.  Exact count will depend on how big you make them.

Friday, June 3, 2011

G'ma V's Ravioli - Pumpkin Goat Cheese and Spinach Goat Cheese

Astute readers have noticed that my main blog page contains a picture of ravioli.  "Are those yours?" they ask.  Not only are they mine, but I shall now grace you with the recipe, including a new filling I created last night.

Background
Some of my earliest and fondest memories include cooking and baking with my family.  Grandma's house, where I spent a lot of time as a child, almost always smelled of garlicky, sausagy red sauce.  And though I often watched and helped cook, somehow I only recently became interested in making ravioli from scratch (having "mastered" the sauce, plain ol' pasta and whole wheat pasta).  Upon receiving Grandma's "recipe" - something Dad typed up on the computer from Grandma's old notes - I discovered the fillings had cow's milk products in them, a blow to my lactose intolerant husband.  It would have been easy enough just to omit cheese and leave the filling mostly meat, but it was autumn and the spirit of the season hit me.  Plus, I had a can of pureed pumpkin sitting around.  When summer rolled around and spinach was once again in season, the alternative filling at the end of this post was born.

Ingredients for Dough
1 C. scant all purpose flour
1 egg
water

Ingredients for Pumpkin Goat Cheese Filling
1 C. pureed pumpkin (NOT pumpkin pie filling - they usually stock them next to each other, so watch out!)
1 oz. crumbled goat cheese (herbed if you like, but note the herbs then play with your end flavor)
1 t. dried rubbed sage (OR 1 t. another herb you like: you could easily go the sweeter route and add cinnamon or nutmeg... or allspice)
1/4 t. garlic powder
salt and pepper to taste

Directions

For the filling, place pureed pumpkin and goat cheese in the top of a double boiler (or a metal bowl that can sit on top of a sauce pan).  While over the heat, use a hand mixer to incorporate these two ingredients together.  You will see the color of the pumpkin puree mellow as the cheese melts in.

Remove from heat and add spices to taste.  PLEASE always taste as you go along.  You know what you like.  If you like a bit more of a kick to your food, you can use a stronger pepper than ground black pepper.  Set aside.


For the pasta dough, on a clean, flat surface, make a little mountain out of the flour.  Starting in the middle, top of the mountain, swirl your finger around wider and wider, so that there is now a hole in the center of your mountain.  Crack one egg into that hole.  With a fork, beat the egg inside the flour mountain.


As you beat, bring more and more flour from the mountain edges into the mixture.  When the flour and egg begin to form a sticky dough that is difficult to manipulate with a fork, switch to kneading with your hands, being sure to incorporate all the flour.


The dough will be dry, so add small amounts of water at a time.  I'm talking several drops, not even a teaspoon - the dough can get too watery quite quickly.  If your dough becomes too watery, fear not, just add a little more flour.  Work the dough until a solid, smooth consistency is reached.  Form dough into a ball and set in a bowl to rest, brushing the top with olive oil and covering with a cloth.  Let dough rest at least 15 minutes to relax the gluten.  With this recipe, you may have filling left over, so feel free to double the dough recipe.  The single recipe should make about 15-20 ravioli.


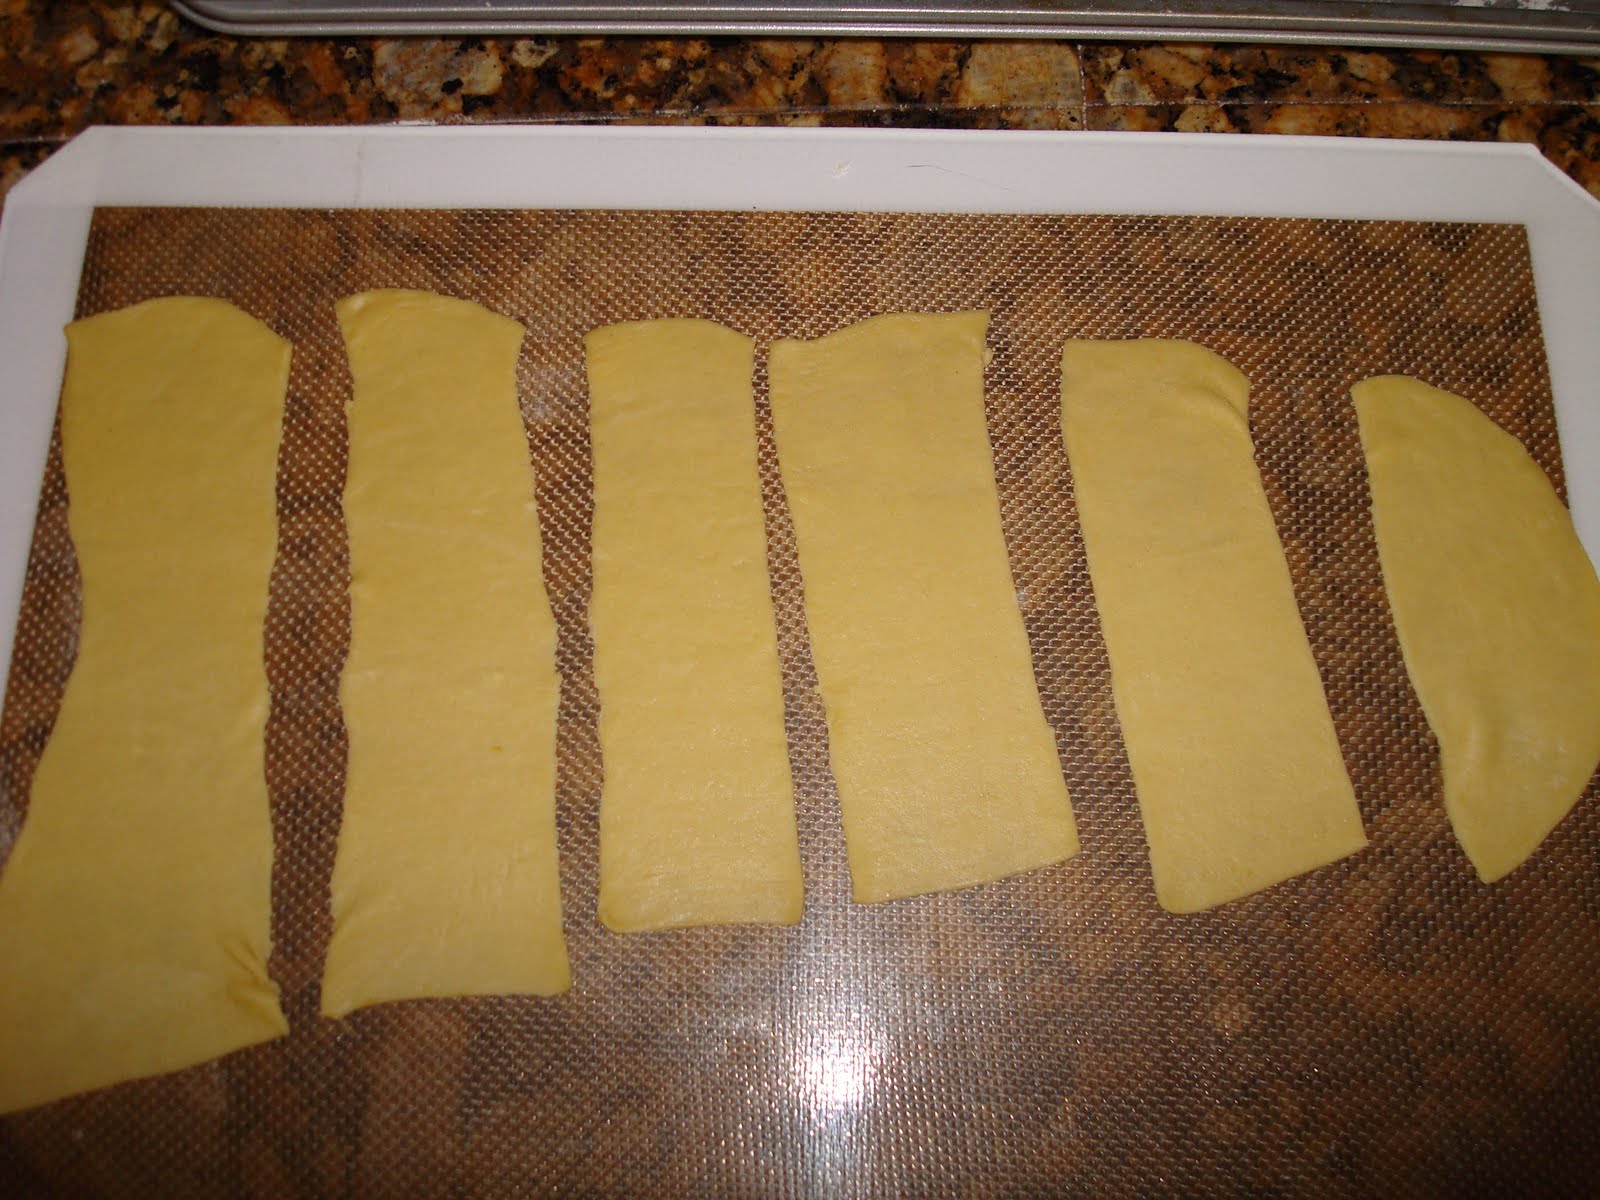
To assemble the ravioli, flour a large, flat, clean surface and roll dough.  Dough should be quite thin, so I find using the roller function on a pasta machine to be quite helpful (you CAN do this by hand with a LONG rolling pin - it will take time).  Follow the instructions on your pasta machine, but generally, you want to start on thicker settings and gradually switch to thinner and thinner settings.  You want a fairly thin dough, but not so thin that your filling will break through.  You'll likely need to work in batches; I usually cut the dough ball in half.  When desired thickness is reached, use a knife to cut ravioli dough into strips, about 2"x5-6".


Place a small amount - just under a teaspoon - of filling on one half of the strip.  You want to be able to fold the other half on top of it, so leave room.  Also, be sure to leave enough room around the edges of your pasta to seal it.  Fold the fillingless half of the pasta over onto the filling half and press edges closed with your fingers, being careful not to let filling seep out.


You can further seal the pasta using an everyday fork.  Using the tines, go around the three non-folded edges, pressing the tines firmly into the dough - but not hard enough to break through into the filling.  You can also trim the outside edges with a knife to make them more uniform - DON'T toss that extra dough, though - reroll it :)


Place finished ravioli on a lightly floured dish towel or piece of wax paper atop a baking sheet.  Do not stack - they will stick together.


If you are freezing your ravioli, sprinkle the tops of the ravioli with flour and place baking sheet(s) directly into freezer.  After a few hours, ravioli can be gathered from the sheets and placed into freezer bags for more compact storage.

To cook your ravioli, shake off any excess flour and place in boiling, salted water on the stove top.  Note: homemade, fresh pasta does not take as long to cook as store-bought, dried pasta.  For fresh ravioli, often 5-7 minutes will do the trick.  Frozen ravioli will take a few more minutes.  The telltale sign that it is done is that the ravioli will float on top of the water.


Spinach and Goat Cheese Filling
1 bunch/bag of spinach (washed, dried, stems removed and roughly chopped)
1/2 large onion, finely chopped
1 t. garlic, minced
olive oil
salt and pepper to taste
2 oz. crumbled goat cheese
1/2 egg

Over medium heat, saute onion in olive oil until almost translucent.  Add garlic and saute a couple minutes more, being sure to avoid burning the garlic.  Add spinach and toss, cooking until the greens are wilted.  Remove from heat and allow mixture to cool completely.  Add in salt, pepper, goat cheese and egg and mix well (I use my hands).  Your filling is now ready to be made into ravioli.  Again, you may have some filling left over - you can always make one more batch of dough.

Friday, May 6, 2011

Fast Food Made at Home: Chicken Nuggets

Background

I love chicken nuggets. Seriously. If you put a McDonald's chicken nugget in front of my face, I will smile (not as big as if you put a kitten in front of my face, but for different reasons...I'm not going to eat a kitten for cryin' out loud, you people are sick!  I digress). However, if you've never read the ingredients in a McDonald's chicken nugget, don't. Save yourself the feeling that your stomach is turning over and over and instead take a gander at the following recipe.

Aside from overall quality, there are three big differences between the processed, conveyor belt nuggets that are handed out that drive thru window and the ones produced in this recipe. First, I use a breadcrumb coating. Second, these nuggets are baked, NOT FRIED. And third, they are easily seasoned according to your tastes using spices, not sugary, salty, fatty sauces. Note: if you choose to use additional sauces, more power to you, I'm just providing the base here.

Ingredients
1 chicken breast, preferably fresh from a butcher
3/4 C. bread crumbs (I like Progresso Italian Seasoned)
Seasonings to taste

(yep, it's that simple, folks)

Directions
Cut the chicken breast into 1-2" squares, trying to keep the pieces relatively similar in size for even cooking. This is where a fresh chicken breast is much nicer. The frozen chicken breasts have often been pounded flat (as you would to make a roulade) and therefore cut into more of flat disks rather than chunks. In a small bowl, or ziplock bag, pour breadcrumbs and seasonings. If using a bowl, use fingers to coat each chicken piece and then place them on a baking sheet (I put them directly on the sheet, no oil and haven't had sticking problems, but if you're worried, I'd try using foil before adding fat :)). If using a ziplock bag (much more kid friendly), simply dump the pieces into the bag, seal with some air inside and shake to coat (it's Shake 'n' Bake, Daddy!). Bake pieces in a 400 degree oven for 15-20 minutes (depending on size of pieces) until cooked throughout.

Let's talk seasonings. This is the fun part, especially if you have children and a variety of spices. I find that at our house, we tend to get in a rut of flavor, using the same spices over and over. So why not try something new? Let your kids smell the different spices you have in your cupboard to see what they might like. Themes we've used and liked:

Taco: cumin, chili powder, garlic powder, salt
Italian: garlic powder, basil, oregano, rosemary, salt, pepper
BBQ: Mesquite Grillers BBQ seasoning, salt

I might also suggest an Asian theme using ginger, garlic and pepper
Perhaps an Indian theme using turmeric, cumin, coriander, cardamom, and garlic

The sky's the limit really and it's all about having fun as a family cooking together. Try a few different combos and have a taste test panel! See who can guess each family member's favorite! And by all means, if and when you do, let me know how it turns out.