Sunday, June 26, 2011

Almond Cookies with Lemon and Dark Chocolate Variations

Background

A few years ago, I was introduced to the wonder that is a pignoli cookie.  Pignoli, or pinoli, being the Italian word for pine nut, these delightful bites are an almond flavored cookie rolled in pine nuts and sprinkled with powdered sugar.  But, have you seen the price of pine nuts lately?  Good gravy!  While I love the taste the pine nuts add, I also love anything that incorporates almond paste, so I started making the cookies sans pignoli coating.

In fact, one of my first experiences making them without pine nuts was for an afternoon tea with a friend.  The recipe made a lot and she enjoyed them, so I sent her home with a tupperware full of extras for her and her husband to enjoy.  The report back? "My husband loves these cookies - says they remind him of some his mother used to make."  That cinched it.  These became a staple.

And then I got creative, mostly because nothing is really ever "finished" in my mind; everything can be improved upon.  Plus, I had a lemon tree going nutso in my backyard.  I played around with a batch of the almond cookie dough and came up with a lemon version.  Wanting to send some to a friend on the East Coast and feeling like I should have more than one variation on a theme, I came up with the dark chocolate version, as well (the first, and failed, iteration of which involved rolling in dutch processed cocoa powder - bitter!).

What follows is the ingredient list and directions for all three variations.  Try at will.


Ingredients
1 pouch (1 lb 1.5 oz.) Betty Crocker sugar cookie mix
½ C. granulated sugar
½ C. butter or margarine, softened
1 can (7 or 8 oz.) almond paste (not marzipan)
1 egg

3 T. lemon zest
yellow decorator’s sugar

½ C. 60% dark chocolate chips


Directions
Preheat oven to 350 degrees.  For plain almond cookies, mix the first 5 ingredients in a stand mixer until well incorporated.  I like to check dough to make sure there aren’t huge chunks of almond paste in places (then again, biting into a chunk of almond paste doesn’t seem like a horrible thing to me!).  With palms, roll dough into roughly 1” balls, trying to keep the dough balls a consistent size for each batch.  Place onto nonstick or greased baking sheet being sure to leave around 2” of space between cookies – they will expand.  Bake for 13 – 17 minutes, until cookies begin to become golden around the edges.  Remove from oven and let sit a few minutes.  Remove cookies to a cooling rack, but eat at least one while they’re still hot – it’s a religious experience.

For lemon almond cookies, add lemon zest to the first five ingredients and mix until well incorporated, again checking for big pieces of almond paste.  After shaping your 1” dough balls, roll in yellow decorators sugar and place on cookie sheet, 2” apart.  The rest is the same.

For Dark Chocolate Almond Cookies, make the plain almond cookies according to the directions above.  When cookies have completely cooled, melt 60% dark chocolate chips in a microwave safe bowl.  To do this, set the microwave to 30 seconds at full power.  After 30 seconds, stir chips and return another 30 seconds.  Repeat until chips are completely melted.  Note that getting water in your melted chips can cause the chocolate to seize (become hard and chunky).  This should be avoided so that your lovely baking experience is not suddenly interrupted by large amounts of swearing.  When chocolate is melted, dip half of each almond cookie in the chocolate and remove to a piece of wax paper.  Finished cookies can be set aside to set up or moved to the refrigerator or freezer for faster setting.

Baker’s note:  If you are the creative type, you may even decide to add further fanciness before the chocolate sets.  I suggest sprinkling the chocolate half of the cookie with some diced fresh almonds, colorful sprinkles or coconut.  Making these for a holiday?  Add some food coloring to your dough before baking – red or green dough against the dark chocolate looks very festive at Christmas time.  Springtime?  How about a pastel dough dipped in white chocolate instead of dark?  Don't be afraid to experiment.


Yield - at least 4 dozen.  Exact count will depend on how big you make them.

Friday, June 3, 2011

G'ma V's Ravioli - Pumpkin Goat Cheese and Spinach Goat Cheese

Astute readers have noticed that my main blog page contains a picture of ravioli.  "Are those yours?" they ask.  Not only are they mine, but I shall now grace you with the recipe, including a new filling I created last night.

Background
Some of my earliest and fondest memories include cooking and baking with my family.  Grandma's house, where I spent a lot of time as a child, almost always smelled of garlicky, sausagy red sauce.  And though I often watched and helped cook, somehow I only recently became interested in making ravioli from scratch (having "mastered" the sauce, plain ol' pasta and whole wheat pasta).  Upon receiving Grandma's "recipe" - something Dad typed up on the computer from Grandma's old notes - I discovered the fillings had cow's milk products in them, a blow to my lactose intolerant husband.  It would have been easy enough just to omit cheese and leave the filling mostly meat, but it was autumn and the spirit of the season hit me.  Plus, I had a can of pureed pumpkin sitting around.  When summer rolled around and spinach was once again in season, the alternative filling at the end of this post was born.

Ingredients for Dough
1 C. scant all purpose flour
1 egg
water

Ingredients for Pumpkin Goat Cheese Filling
1 C. pureed pumpkin (NOT pumpkin pie filling - they usually stock them next to each other, so watch out!)
1 oz. crumbled goat cheese (herbed if you like, but note the herbs then play with your end flavor)
1 t. dried rubbed sage (OR 1 t. another herb you like: you could easily go the sweeter route and add cinnamon or nutmeg... or allspice)
1/4 t. garlic powder
salt and pepper to taste

Directions

For the filling, place pureed pumpkin and goat cheese in the top of a double boiler (or a metal bowl that can sit on top of a sauce pan).  While over the heat, use a hand mixer to incorporate these two ingredients together.  You will see the color of the pumpkin puree mellow as the cheese melts in.

Remove from heat and add spices to taste.  PLEASE always taste as you go along.  You know what you like.  If you like a bit more of a kick to your food, you can use a stronger pepper than ground black pepper.  Set aside.


For the pasta dough, on a clean, flat surface, make a little mountain out of the flour.  Starting in the middle, top of the mountain, swirl your finger around wider and wider, so that there is now a hole in the center of your mountain.  Crack one egg into that hole.  With a fork, beat the egg inside the flour mountain.


As you beat, bring more and more flour from the mountain edges into the mixture.  When the flour and egg begin to form a sticky dough that is difficult to manipulate with a fork, switch to kneading with your hands, being sure to incorporate all the flour.


The dough will be dry, so add small amounts of water at a time.  I'm talking several drops, not even a teaspoon - the dough can get too watery quite quickly.  If your dough becomes too watery, fear not, just add a little more flour.  Work the dough until a solid, smooth consistency is reached.  Form dough into a ball and set in a bowl to rest, brushing the top with olive oil and covering with a cloth.  Let dough rest at least 15 minutes to relax the gluten.  With this recipe, you may have filling left over, so feel free to double the dough recipe.  The single recipe should make about 15-20 ravioli.


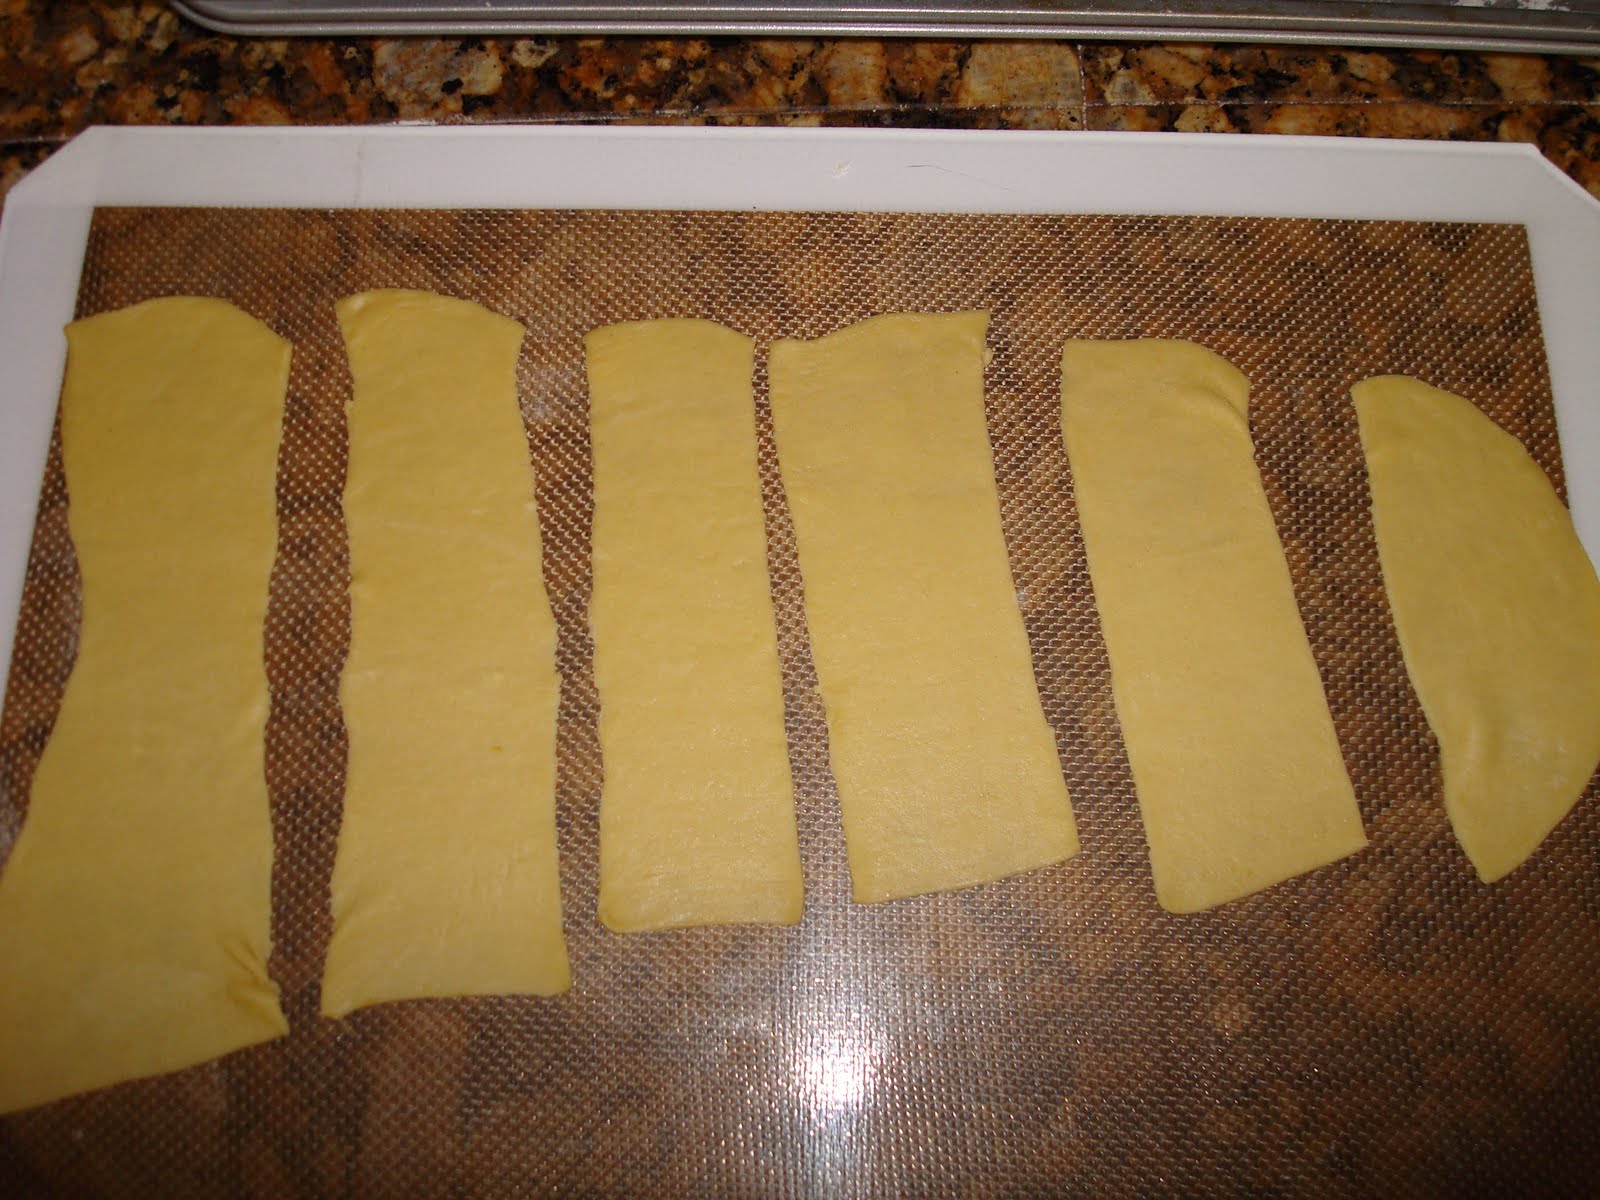
To assemble the ravioli, flour a large, flat, clean surface and roll dough.  Dough should be quite thin, so I find using the roller function on a pasta machine to be quite helpful (you CAN do this by hand with a LONG rolling pin - it will take time).  Follow the instructions on your pasta machine, but generally, you want to start on thicker settings and gradually switch to thinner and thinner settings.  You want a fairly thin dough, but not so thin that your filling will break through.  You'll likely need to work in batches; I usually cut the dough ball in half.  When desired thickness is reached, use a knife to cut ravioli dough into strips, about 2"x5-6".


Place a small amount - just under a teaspoon - of filling on one half of the strip.  You want to be able to fold the other half on top of it, so leave room.  Also, be sure to leave enough room around the edges of your pasta to seal it.  Fold the fillingless half of the pasta over onto the filling half and press edges closed with your fingers, being careful not to let filling seep out.


You can further seal the pasta using an everyday fork.  Using the tines, go around the three non-folded edges, pressing the tines firmly into the dough - but not hard enough to break through into the filling.  You can also trim the outside edges with a knife to make them more uniform - DON'T toss that extra dough, though - reroll it :)


Place finished ravioli on a lightly floured dish towel or piece of wax paper atop a baking sheet.  Do not stack - they will stick together.


If you are freezing your ravioli, sprinkle the tops of the ravioli with flour and place baking sheet(s) directly into freezer.  After a few hours, ravioli can be gathered from the sheets and placed into freezer bags for more compact storage.

To cook your ravioli, shake off any excess flour and place in boiling, salted water on the stove top.  Note: homemade, fresh pasta does not take as long to cook as store-bought, dried pasta.  For fresh ravioli, often 5-7 minutes will do the trick.  Frozen ravioli will take a few more minutes.  The telltale sign that it is done is that the ravioli will float on top of the water.


Spinach and Goat Cheese Filling
1 bunch/bag of spinach (washed, dried, stems removed and roughly chopped)
1/2 large onion, finely chopped
1 t. garlic, minced
olive oil
salt and pepper to taste
2 oz. crumbled goat cheese
1/2 egg

Over medium heat, saute onion in olive oil until almost translucent.  Add garlic and saute a couple minutes more, being sure to avoid burning the garlic.  Add spinach and toss, cooking until the greens are wilted.  Remove from heat and allow mixture to cool completely.  Add in salt, pepper, goat cheese and egg and mix well (I use my hands).  Your filling is now ready to be made into ravioli.  Again, you may have some filling left over - you can always make one more batch of dough.

Friday, May 6, 2011

Fast Food Made at Home: Chicken Nuggets

Background

I love chicken nuggets. Seriously. If you put a McDonald's chicken nugget in front of my face, I will smile (not as big as if you put a kitten in front of my face, but for different reasons...I'm not going to eat a kitten for cryin' out loud, you people are sick!  I digress). However, if you've never read the ingredients in a McDonald's chicken nugget, don't. Save yourself the feeling that your stomach is turning over and over and instead take a gander at the following recipe.

Aside from overall quality, there are three big differences between the processed, conveyor belt nuggets that are handed out that drive thru window and the ones produced in this recipe. First, I use a breadcrumb coating. Second, these nuggets are baked, NOT FRIED. And third, they are easily seasoned according to your tastes using spices, not sugary, salty, fatty sauces. Note: if you choose to use additional sauces, more power to you, I'm just providing the base here.

Ingredients
1 chicken breast, preferably fresh from a butcher
3/4 C. bread crumbs (I like Progresso Italian Seasoned)
Seasonings to taste

(yep, it's that simple, folks)

Directions
Cut the chicken breast into 1-2" squares, trying to keep the pieces relatively similar in size for even cooking. This is where a fresh chicken breast is much nicer. The frozen chicken breasts have often been pounded flat (as you would to make a roulade) and therefore cut into more of flat disks rather than chunks. In a small bowl, or ziplock bag, pour breadcrumbs and seasonings. If using a bowl, use fingers to coat each chicken piece and then place them on a baking sheet (I put them directly on the sheet, no oil and haven't had sticking problems, but if you're worried, I'd try using foil before adding fat :)). If using a ziplock bag (much more kid friendly), simply dump the pieces into the bag, seal with some air inside and shake to coat (it's Shake 'n' Bake, Daddy!). Bake pieces in a 400 degree oven for 15-20 minutes (depending on size of pieces) until cooked throughout.

Let's talk seasonings. This is the fun part, especially if you have children and a variety of spices. I find that at our house, we tend to get in a rut of flavor, using the same spices over and over. So why not try something new? Let your kids smell the different spices you have in your cupboard to see what they might like. Themes we've used and liked:

Taco: cumin, chili powder, garlic powder, salt
Italian: garlic powder, basil, oregano, rosemary, salt, pepper
BBQ: Mesquite Grillers BBQ seasoning, salt

I might also suggest an Asian theme using ginger, garlic and pepper
Perhaps an Indian theme using turmeric, cumin, coriander, cardamom, and garlic

The sky's the limit really and it's all about having fun as a family cooking together. Try a few different combos and have a taste test panel! See who can guess each family member's favorite! And by all means, if and when you do, let me know how it turns out.

Monday, April 18, 2011

Herbed Parmesan Bowls

Background

When Mom and Dad came to visit this month, Dad arrived with a plan in mind.  He had heard of Parmesan crisps and Parmesan bowls, but never saw the bowls done incorporating other flavors.  How hard could it be?  Turns out, not terribly.  The trick in this recipe is in timing the cheese melting correctly; once that is down, you can make as many bowls as you want, or your wallet allows.  The fun in this recipe is that because you make a bowl for each diner, you can personalize the seasonings.  We did a plain bowl, a garlic bowl, a rosemary basil bowl, a Pasta Sprinkle (TM Penzey's) bowl and a Pasta Sprinkle & garlic bowl.

Ingredients
rounded 1/2 C. grated Parmesan cheese
heavy 10" frying pan
vegetable oil
spices (such as basil, tarragon, dill, garlic, pepper, etc.)
cereal bowl (turned upside down on counter top)

Directions
Coat the bottom of the 10" frying pan with vegetable oil (just enough to coat, no excess) and place over medium heat.  Allow pan to become hot, then sprinkle Parmesan quickly and evenly around the bottom of the pan.  The cheese should begin to melt immediately.  Using a rubber spatula, push any cheese "stragglers" from the sides of the pan onto the bottom.  Allow cheese to melt and start to brown, ~3 minutes.  If using an herb or spice, sprinkle evenly around the cheese.  Remove from heat.

Finished Herbed Parmesan Bowls
Immediately, begin working the spatula under one edge of the cheese.  When it becomes apparent that the cheese will loosen from the bottom easily, turn the pan over *above your upside-down cereal bowl*.  Because the cheese may not release from the pan itself, you may need to encourage it with your spatula some more after turning it over.  With enough coaxing, the cheese will release from the pan and fall onto your bowl.  Seldom did we find it did so perfectly.  No matter, it is still quite hot.  If you find that it falls unevenly, or that a side or corner turns under, just reach in and fix it.  Warning: it IS still quite hot.  When you contact it to manipulate it, do so quickly!  You may also want to press it to the sides of the bowl to make sure it forms a tighter shape.

Allow the cheese bowl to cool upside down for at least 5 minutes, until it is hard and crispy.  Remove from cereal bowl and place on a wire rack or platter for later use.  Repeat.


Notes

Herbed Parmesan Bowl with Lemon Chicken Salad
• It was only necessary to oil the bottom of the pan for the first Parmesan bowl.  After that, the cheese released enough grease to do the trick for the next bowl.  Mmmm, grease.
• You may notice that some of your herbs stick to the bottom of the cereal bowl while the Parmesan bowl is cooling.  That is okay.  If you worry of cross-contamination, simply rinse your cereal bowl between Parmesan bowl construction.
• We chose to fill our bowls with salad, but you may also try fruit.  I would stay away from hot things because, well, melting.  But if you find some other winning filling, do let us all know!

Friday, March 25, 2011

Asparagus and Poached Eggs

Background

Given that this is the Facebook recipe post that broke the camel's back and inspired the creation of this blog, I thought I'd make it the first recipe.  It debuted on my profile a little over a year ago, but now that Lent has rolled around again, this seems a good time to post a vegetarian dish.

 **************************

The first Friday of Lent this year, I found myself longing for a vegetarian dish I'd had several times in Madison at Osteria Papavero. It was a simple asparagus and poached egg dish (ehh, probably swimming in some decent amount of butter), and I think it's safe to say, it was one of the best things I've ever eaten. Ever. But really, there's not a *lot* to it in and of itself (Osteria Papavero is more of a Mediterranean Tapas place). This is my attempt to recreate it as a dinner.

Ingredients

1 C. brown rice
1-2 T. dried parsley flakes
1-2 t. onion salt (or garlic salt)
1 lb. asparagus, tough ends removed
2-3 eggs (one for each person you will be serving)
2-3 slices muenster cheese (same deal)

Directions

Cook rice according to directions on container. When rice is cooked, season with parsley and garlic salt. Meanwhile, boil asparagus about 5 minutes (shorter if you like it snappier, longer if you like it mushier). Remove and cover to keep warm. In asparagus water (waste not, want not), poach eggs for 3-5 minutes. A three-minute egg's yolk will run when you cut into it, a 5 minute egg's yolk will be much more solid.

To serve, spoon rice into a bowl. Top each bowl of rice with 4-5 spears of asparagus. Top the asparagus with an egg and top the egg with a slice of cheese. If you like your cheese more melted, you can place the dish under the broiler for just a few minutes (please be sure it's a broiler-safe dish!).

Yield: this served me and one other quite hungry boy :) Typically, I would say it serves 3.


Variation: Asparagus and Poached Eggs Over Pasta in a Lemon-Basil Oil

Omit the rice, parsley and onion salt from the above recipe and instead use:
1 C. whole grain pasta (the shape isn't important; I used elbows)
Juice from 1/2 lemon
1/4 C. olive oil (or more depending on potency of lemon)
1 t. dried basil leaves
salt to taste

Prepare as above.  But before assembling the dish, whisk together lemon juice, olive oil, basil and salt and pour over drained pasta.  Stir well, then assemble dish.

Pictured below is this variation with a bit of crisp bacon added... because my husband loves bacon - in a sort of alarming way - so bacon, he gets.  He also cannot eat dairy, so the cheese is omitted from this picture.

Thursday, March 24, 2011

Obligatory Welcome Post

Welcome to my blog!  Did I get that right?  I am fairly certain I am now supposed to say something clever about this being "my little corner of the internet" or similar.  But really all I want to do is introduce you to what I hope to accomplish here and why I started this blog.

Several years ago, the younger folk in my graduate program encouraged me to create a Facebook profile, which I shied away from at first.  But after some healthy and continuous encouragement, I gave in and quickly began using it as a way to share my experiences in the kitchen.  In addition to a photo album of the dishes I created, whose title inspired that of this blog, I also discovered that most of the "notes" I posted were really just recipes.  And they got a lot of response.  After a while, I tuned into the chorus of "you should start a blog" and decided to make the move over to blogspot.  Thus, here I am to share my experiences, recipes and pictures with you.  Any questions?

So seriously, are you any good?  Yeah, I hear you - you want credentials.  If I'm being perfectly honest, I have none.  I am not a professional chef, nor have I ever been paid to cook for anyone (save one very cool vegan cupcake gig for a friend's client's wedding).  In high school, I worked as a drive-thru gal at the Long John Silver's, but my m.o. there was to stay as far away from the grease vats as possible!  And though I cupped a lot of coleslaw, I don't count that as kitchen skill.

But you're still writing a cooking blog?  I am.  While I think culinary classes, schools, etc. are very cool and quite valuable, I do not believe they are the only way in which knowledge is gained.  Most of my cooking experience started in the home.  My family spent a lot of time in the kitchen.  Whether Grandma was making cappelletti or Dad was whipping up homemade pizza dough, it was usually a family affair.  By late elementary school, I even had a specialty: banana bread.  I can't ever recall being kicked out of a kitchen.

Then you mostly do pasta and baked goods?  I have a propensity for baked goods, it's true.  When my husband stopped tolerating dairy, I dove into the world of vegan baking and got a kick out of it.  But I also just like fooling around in the kitchen, in general.  Dad is much the same way; when I was young, he'd routinely invent new dishes to feed us.  If we liked it, he wrote down what he did and we all got to pick a name for the recipe.  Our favorite was a breakfast pizza of sorts that we decided to call Something Good For Breakfast solely for the purpose of having sleepovers, yelling downstairs in front of our friends, "are we having something good for breakfast today?" and getting the response, "no!"

Are you always that creative?  Of course!  No.  I'm not.  Most of my recipe titles are far more usefully descriptive and far less humorous.  And sometimes I get stuck in an ingredient rut.  For these reasons, I *always* welcome feedback.  Please, let me know what you think.  Try my recipes, see what works for you.  If you make modifications, let everyone on the blog know what was particularly good or conversely, what didn't turn out well.  As you can likely glean from what I've told you of my experience, I really think cooking is a community affair; the internet is just a tool to expand that community.  I look forward to hearing from you all.