Friday, July 19, 2013

Stuffed Zucchini


Background

Several years ago, when living in the northern Midwest, I made my foray into vegetable gardening after realizing how much money I was spending on produce.  Besides the amount of work that goes into creating a garden of this sort, I learned one very important thing: you have to watch your zucchini plant closely.  Otherwise, this happens:


Now, let's fast-forward to the present.  I once again have a vegetable garden, but this time in California, where I'm now convinced all plants are sold with alien steroid technology in them.  This garden is largely thanks to my father, who built me a gorgeous custom planter box and then planted vegetables for us while we watched over our family's newest edition.  At the beginning, I was quite good at checking the plants regularly, but with an infant in the house, that regularity becomes a thing of the past more quickly than one might think.  I was still getting out about 3 times a week, but what I wasn't doing was spending enough time looking.  Yesterday, I picked up a leaf I ordinarily don't look under and discovered... well, I'll let the picture do the talking:


Yeah, it's worse than the first one.  We weighed it: 5 lbs.  Thinking that when I cracked it open, it would be all seeds (like the previous zuc), I figured I wouldn't be able to do much with it.  Turns out, it didn't have that many seeds at all, and I had halved it lengthwise, so it was perfect to stuff.


Ingredients
1 unbelievably giant zucchini -or- 2 large regular, non-mutant zucchini, halved lengthwise
1 lb. ground beef
1 lb. ground turkey (or 2 lbs. of one of these - this is just what I had)
1 egg
1/2 C. whole grain bread crumbs
1 8 oz. can diced tomatoes, not drained
1 small red onion, chopped
salt, pepper, granulated garlic, dried rosemary, dried oregano, etc. to taste
goat cheese (optional)

Directions
Scoop seeds out of each zucchini half, making sure the hole you create is big enough to hold a stuffing mixture.  I scooped some of the flesh of the zucchini as well.  If you do this, reserve it in a bowl and mix it into the stuffing.  Place zucchini halves in a 9x13" baking pan (or 2 if you have the giant mutant variety!).


Mix the rest of the ingredients together, mashing with your hands.  Stuff mixture into zucchini.  It will be quite tall.  Any extra can fall to the baking dish around the squash.  It'll cook too.  If you are using goat cheese, press little chunks into the top.


Bake at 350 degrees for an hour, or until meat and zucchini are cooked through.  Let cool a bit and enjoy!


Friday, February 22, 2013

Fast Food Made at Home: Take That, Egg McMuffin!


Background
Can I do that?  Can I mention "Egg McMuffin" in my post, or title no less, and not get sued by McDonald's?  I guess we'll find out!  Some time back, I started a series about mimicking fast food in your own kitchen.  Of course, the thing we want to mimic most is the taste; we're interested in attempting to ban all the preservatives, chemicals, extra fat and the like that somehow get injected into many fast food items.  So, with that in mind, and in combination with a mandate from my ob and gestational diabetes dietician to heavily watch carb intake, I present the next installment: the breakfast sandwich.  My iteration here is an attempt at one that uses egg, canadian bacon and cheese, but if you're a sausage or bacon fan, feel free to substitute.  I will say, the canadian bacon option is nice because it's so fast - and far less greasy than cooking bacon!  But see below for suggestions on subbing other meats.

Ingredients
1 egg
1/2 whole wheat sandwich thin
1 slice nitrate-free canadian bacon (I use a version from Hormel)
1 slice lowfat cheese (look for versions of provolone, swiss and cheddar from Alpine Lace or Sargento)
salt to taste
basil (or other seasoning, such as dill) to taste

Directions
 
In a small ramekin, beat egg with a bit of water, salt, and whatever spice you choose, if you choose. 


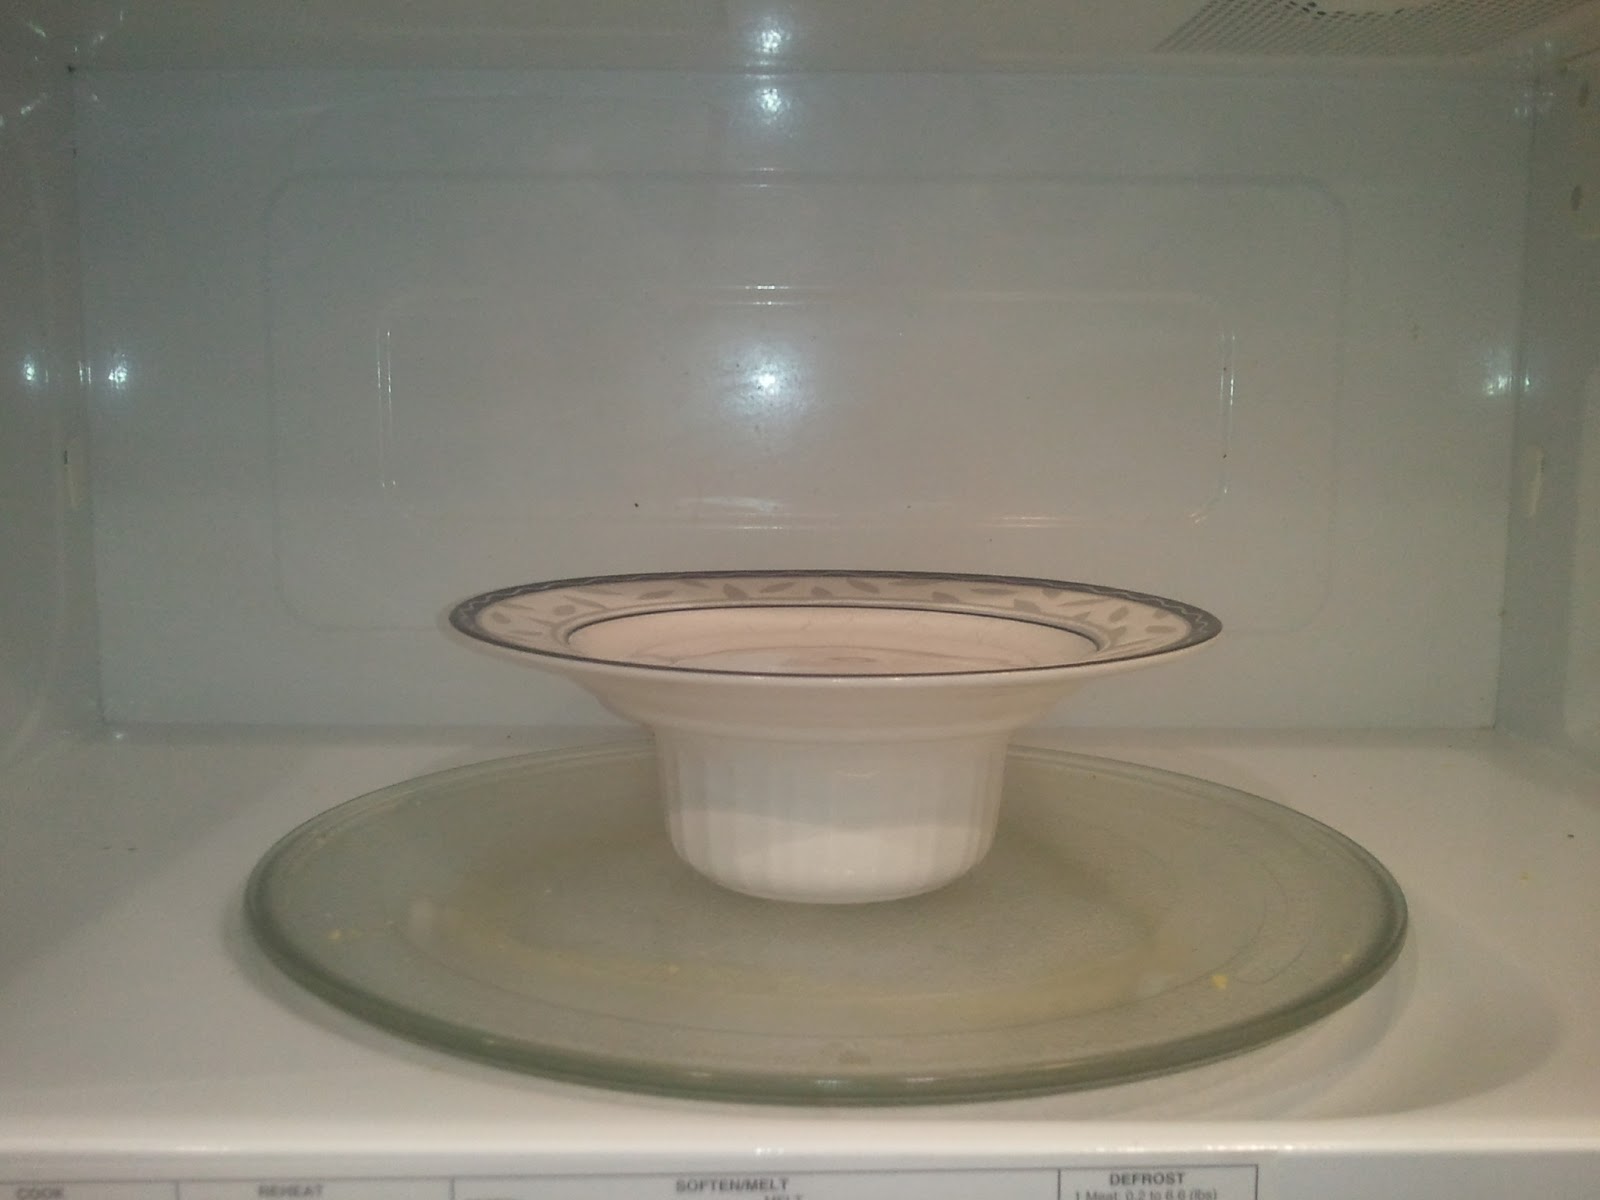
Place in microwave, covered with a salad/dessert plate.  Cook at 70% power for: 60 seconds for a jumbo egg, 55 seconds for a large egg.  You may hear some popping, but don't worry.  Your plate should be heavy enough to keep the egg in the ramekin.  If it gets too wild, pause the cooking process, let the egg settle down and then restart. 


Note that your microwave and mine might be different, so if this happens a lot, try cooking for slightly less time or at a slightly lower power level.


When egg is done, remove plate from top, wiping off bottom with a kitchen towel.  Place the 1/2 sandwich thin onto the same plate, topped with the canadian bacon and the cheese.  Remove the ramekin with the egg in it and put the plate in the microwave, heating contents for about 15 seconds, just until cheese is melty.  Remove the plate.  Run the handle end of your fork around the edge of the egg in the ramekin to loosen it from the sides.  Invert the ramekin over your thin, canadian bacon, and cheese so that it falls into the center. 


Let cool for a couple minutes and enjoy!


Substitutions and Notes
• In a fit of poor planning, one morning I ran out of canadian bacon.  I did have some nitrate-free ham, however, and popped a couple super thin slices of that atop the sandwich thin.  It was delicious and just as easy!

• If you like sausage or bacon, you can always feel free to cook some and use it instead.  The reason I haven't is because this dish is so easy and takes very little time.  To prepare those meats not only requires some forethought on my part (please read other blog posts to realize how elusive forethought is in my life!), but it also dirties a pan.  However, if you don't care about those things - forge ahead!

• If you care less about preservatives, but like the bacon and sausage, there are plenty of products out there that might make adding them to your sandwich a bit easier.  Hormel makes some bacon bits that seem more like real bacon than I remember from the past - they may be called bacon pieces.  Those could even be added to your egg mixture instead of put directly on the sandwich thin.  I have also seen some frozen sausage options that might be easy, though we've only ever tried the Morningstar soy product.  If you try any of these and it's fantastic, be sure to leave us all a note letting us know!

• Astute readers will notice that I've only used half a sandwich thin.  This is, in fact, an open faced sandwich.  Making it this way brings me up to 11 g of carbohydrates for breakfast and, in my current condition, that is all my body can handle.  If you're not in my same boat, feel free to add the second sandwich thin half on top.  Then you've got a real sandwich!

Wednesday, January 23, 2013

Baked Buffalo Chicken Breasts - Attempt 1


Background
Sometime early in the day, I took out chicken breasts to thaw.  Tossing them in the microwave - the one place we found we can let meat thaw without cats getting at it - I made a mental note, "at some point today, I should figure out what to do with this."  And then, magically, it was 5:30.  Crunch time.  Having recently being diagnosed with gestational diabetes, recipes have become a bit more restricted, but I felt confident I could come up with something using my tried-and-true "rummaging through the fridge" technique.  What was that?  Some Buffalo Wild Wings Spicy Garlic sauce, and what do you know, it had a very, very small amount of carbs.  Bingo!  I set to work, thinking about several other recipes I'd made in the past and combined things to come up with this one.

Thing is, it didn't turn out as awesome as I would have liked.  But I think it's important to admit that to you, and to myself.  It's all part of the process of cooking.  Sometimes we're not awesome, folks.  And it's really okay.  How not awesome was I?  Well, I lost most of the spicy garlic buffalo taste, so fairly.  Not to worry, we still ate it and it was still delicious with a tangy aftertaste, just not what I intended.  Dipped in additional sauce, it was outstanding.  I will include some thoughts on modification below the recipe.

Ingredients
1 whole boneless, skin-on chicken breast, cut in half
2 T. Buffalo Wild Wings Spicy Garlic sauce (or other favorite buffalo sauce - this one is dairy-free)
1T. extra virgin olive oil
1/8 C. bread crumbs
Italian seasoning
Tarragon
Salt
Pepper

Directions
Preheat oven to 400 degrees.  Wash chicken breasts and pat dry.  In a bowl large enough to dip each breast in, whisk buffalo sauce and olive oil together.  On a small plate, mix bread crumbs and seasonings (to taste - I added the tarragon for sweetness… I actually wanted basil, but was out - how did that happen??).  Dip both sides of each chicken breast into the sauce mixture and then dip skin side into bread crumbs.  Place in baking pan, skin side up.  If you have extra bread crumb mixture, sprinkle or pat onto chicken breasts.  Bake in center of oven 20-30 minutes (depending on thickness of chicken breasts), until juices run clear and meat is cooked through (no pink).


Accompanied with Easy Garlic Aioli (below)

Notes
As mentioned above, I lost a lot of buffalo flavor in the cooking process.  The next time I make this dish, I will try one of the following:
• omit mixing the olive oil with the buffalo sauce.  I did this because I thought it would coat better, but I fear it just diluted the flavor
• poke chicken breasts with a fork and let them marinate in the buffalo sauce/olive oil mixture for a few hours before dipping in bread crumbs


Easy Garlic Aioli
1/2 C. light mayo
1 heaping teaspoon chopped garlic (I used the jar stuff because I'm simply exhausted)
1 T. lemon juice (or juice from one lemon from our tree - which are somehow super potent)
1/4 t. salt
1/4 t. pepper (or both seasonings to taste)

Mix ingredients together, cover and let sit in fridge for at least half an hour.


Thursday, January 3, 2013

Salsa Chicken


Background
I found a good sale on tomatoes in the grocery store, so brought a bunch home.  I never know what I'm going to do with them when I find them, but given the tomato consumption rate in this house, I never worry they'll go unused.  So, I decided to make salsa.  The first night, it accompanied fajitas, but even with second-trimester hunger on my side, we had a bunch left over.  The next night, I longed for something more hearty and eyed the chicken breasts and potatoes I had awaiting my culinary spin.  Sure, let's toss it all together, I thought.  Lo and behold: an easy, yummy, filling dish that I would deem good year-round!

Ingredients
2 bone-in, skin-on chicken breasts
1 lb. potatoes, cut into 1" cubes
1 - 1.5 C. homemade salsa (recipe below - can be made ahead of time)
Salt and pepper to taste

Directions
This will be short and sweet, folks!

Preheat oven to 400 degrees.

Wash chicken breasts and pat dry with a paper towel.  Place skin-up in a 9x13" baking dish.  Place diced potatoes evenly around chicken.  Spoon salsa over potatoes and a bit of the juice over the chicken.  Sprinkle top of chicken with salt and pepper.


Bake, uncovered for 45 minutes or until chicken is cooked through and juices run clear; the skin of the chicken should have a lovely golden-brown color.


Salsa Recipe
2 C. finely diced tomato
1/2 - 3/4 C. finely diced onion
1 finely diced pepper, serrano or jalapeno - depending on heat preference (optional)
1 heaping t. minced garlic
juice from 1 lemon or lime
olive oil
salt and pepper

The quantities I specify are subjective and anything that does not have a quantity (olive oil, salt and pepper) really should be added to taste.  If you really like onion, add more; if not, add less.  If you love a super spicy salsa, omit the serrano and jalapeno and go full-on habanero!  Honestly, I do the whole thing by sight and taste.

Please also remember that as your salsa sits, the flavors will come out more.  I made a salsa once with a good friend early in the day.  When we tasted, we felt very little heat, so added more pepper.  By the time we ate that night, our eyes were watering.  Lesson learned!